Azure IoT Edge quickstart
Since the getting started tutorials assume you are already using Azure IoT Edge and Azure IoT Hub, some newer users might benefit from a bit extra information. This article serves as a short list of references and tips for users who may be new to Azure IoT Edge or Azure IoT Hub.
Tip: Alvaldi integrates with a specific IoT Hub, and specific IoT Edge devices. This means you can create a new IoT Hub for testing in your Azure account and test Alvaldi on a device and IoT Hub separate from the resources you already have in Azure. Provided you have the necessary access to create these kinds of resources, you don’t need to set up a new Azure account.
Creating an Azure account
If you don’t have an Azure account yet, you can sign up via Microsoft’s websites and get started using free credits:
https://azure.microsoft.com/en-us/free/iot/
(Click the Start free button and follow their process).
Creating an IoT Hub
If/when you have an Azure account, you can find the different Azure services at:
Find IoT Hub in the list of services. If you don’t already have an IoT Hub you want to use, click the create button. When you’re just testing this for the first time, you can fill out some appropriate names in the required fields, and leave everything else as is.
Install a supported OS on a supported device
Ensure your device is supported and running a supported operating system. We recommend a Raspberry Pi 4 with 32-bit Raspberry Pi OS Legacy (ARM32v7). (This OS is based on Debian 11 Bullseye). The Raspberry Pi Imager can help you download and flash the OS to an memory card:
https://www.raspberrypi.com/software/
Tip: Inside the tool, don’t choose the default OS, find the OS in the list of more options.
Install the Azure IoT Edge runtime
You need to create a device in your IoT Hub, to get a connection string. For simplicity when testing, we recommend provisioning devices using symmetric keys.
To find the connection string for a device, navigate to your IoT Hub, and find the device in the Devices list:
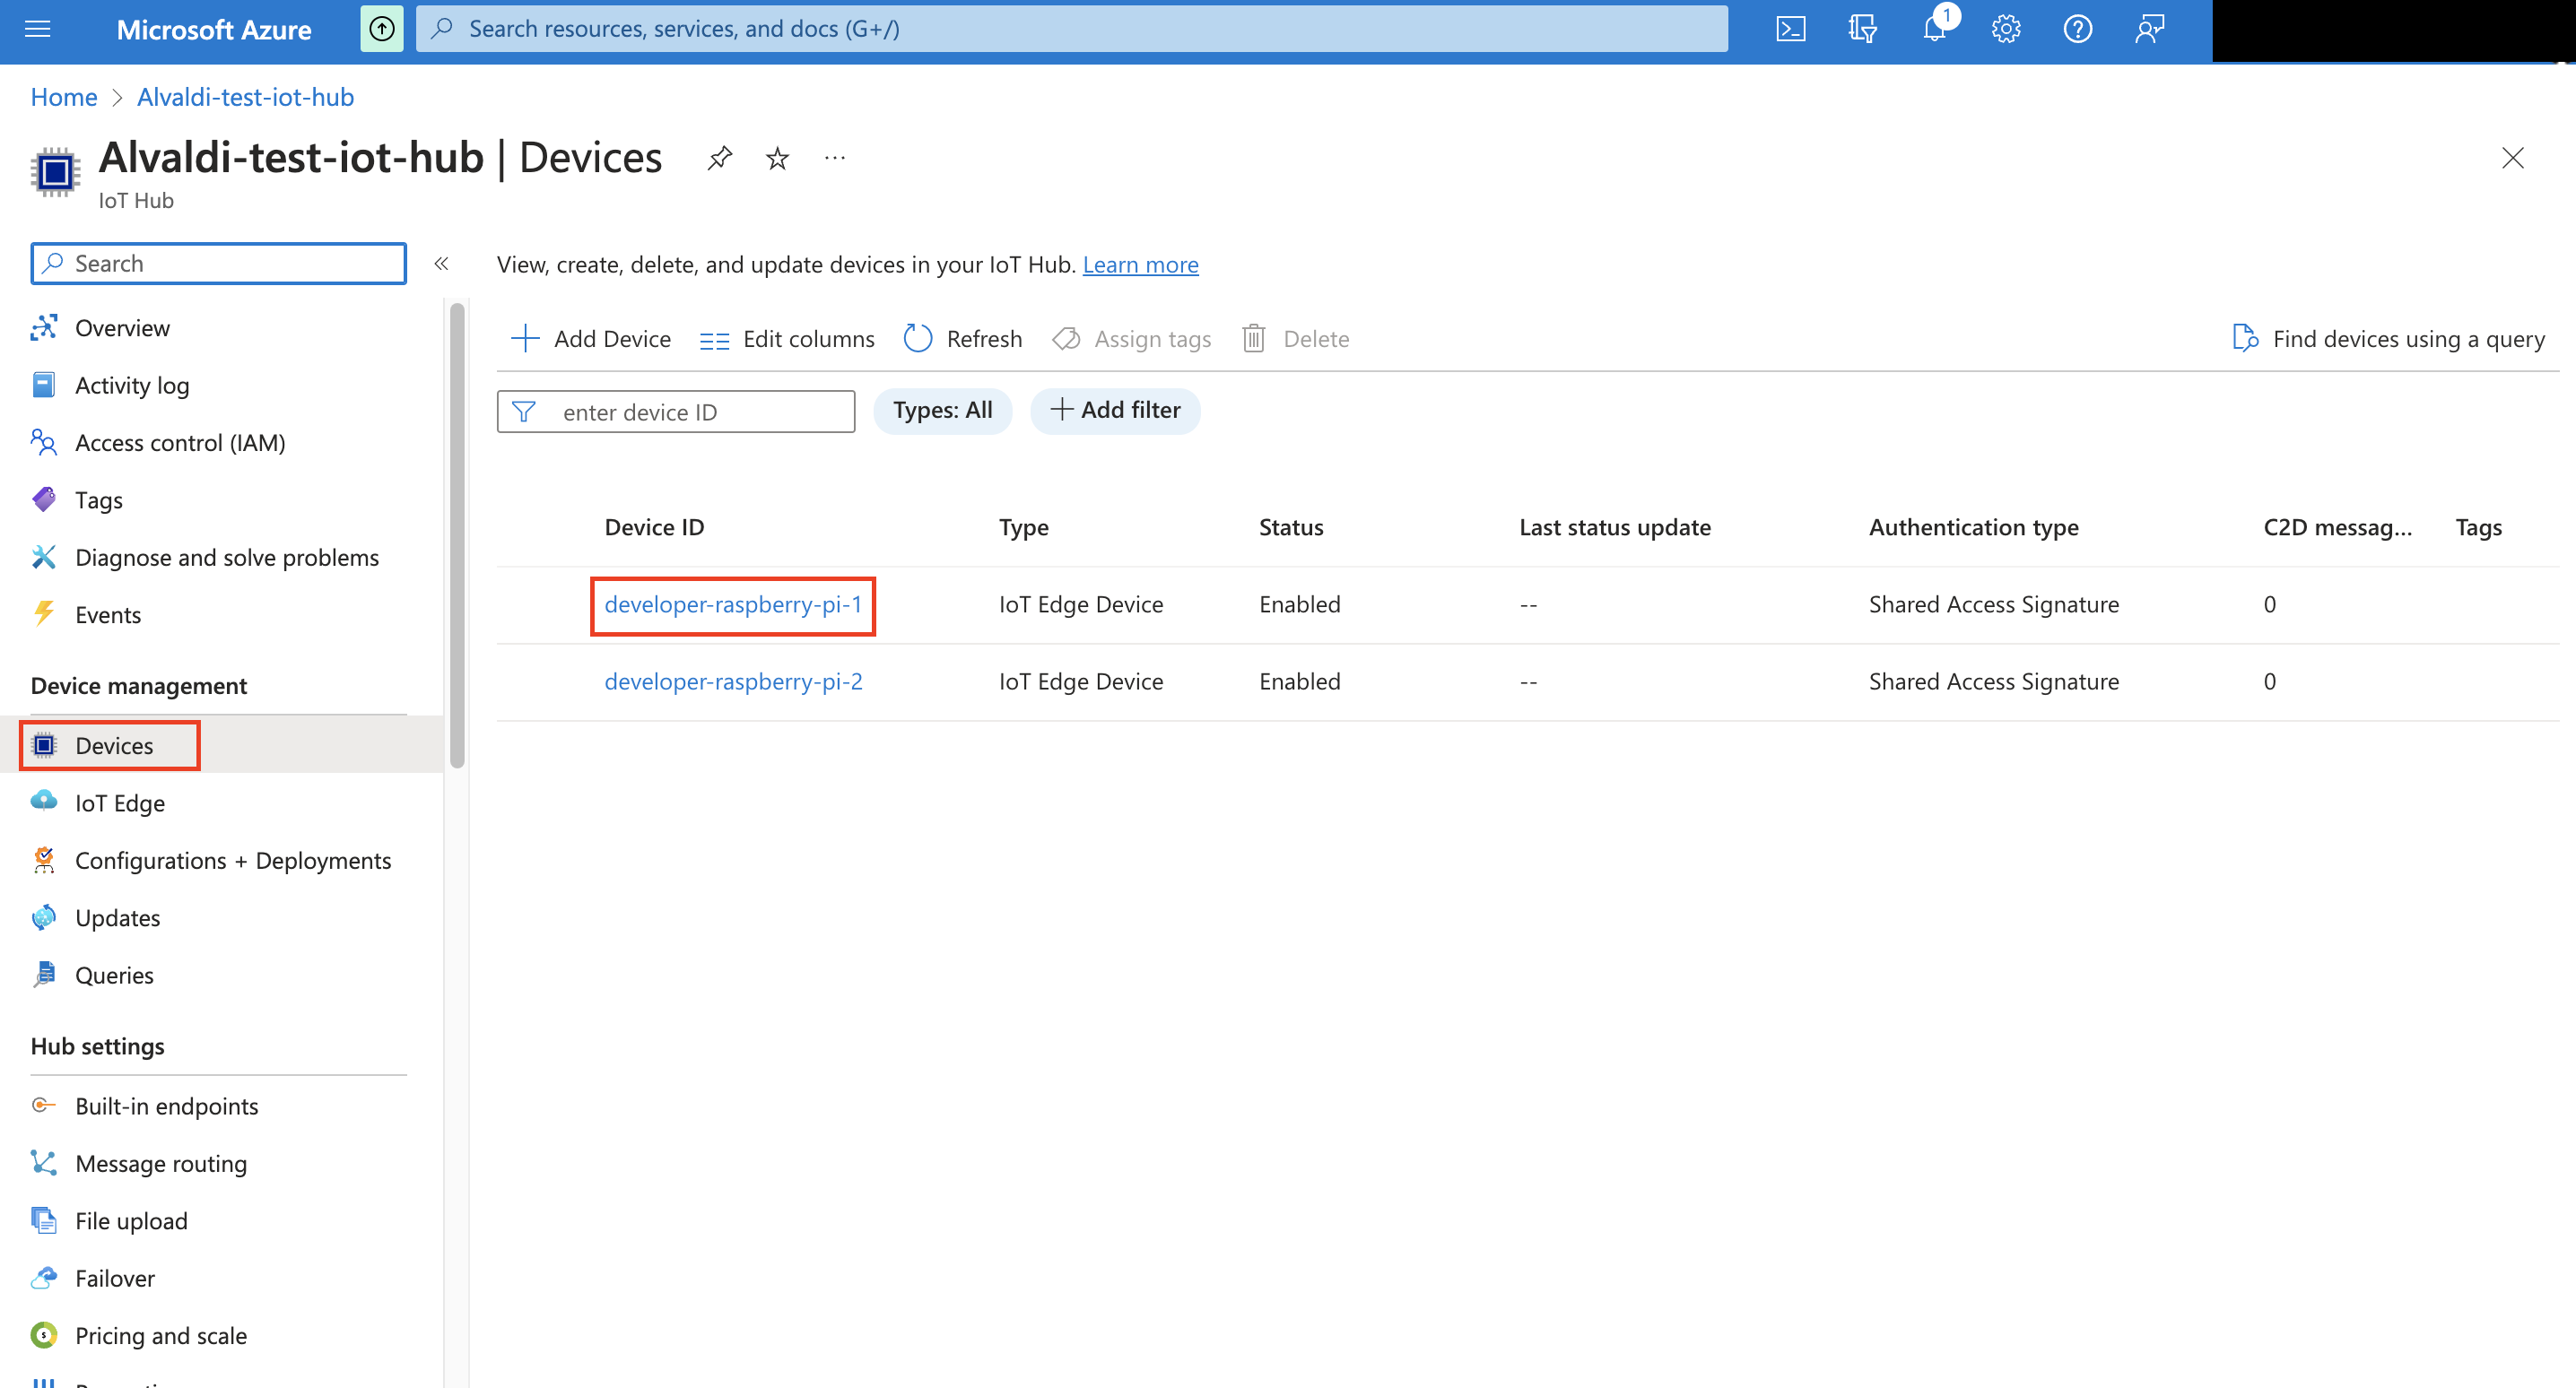
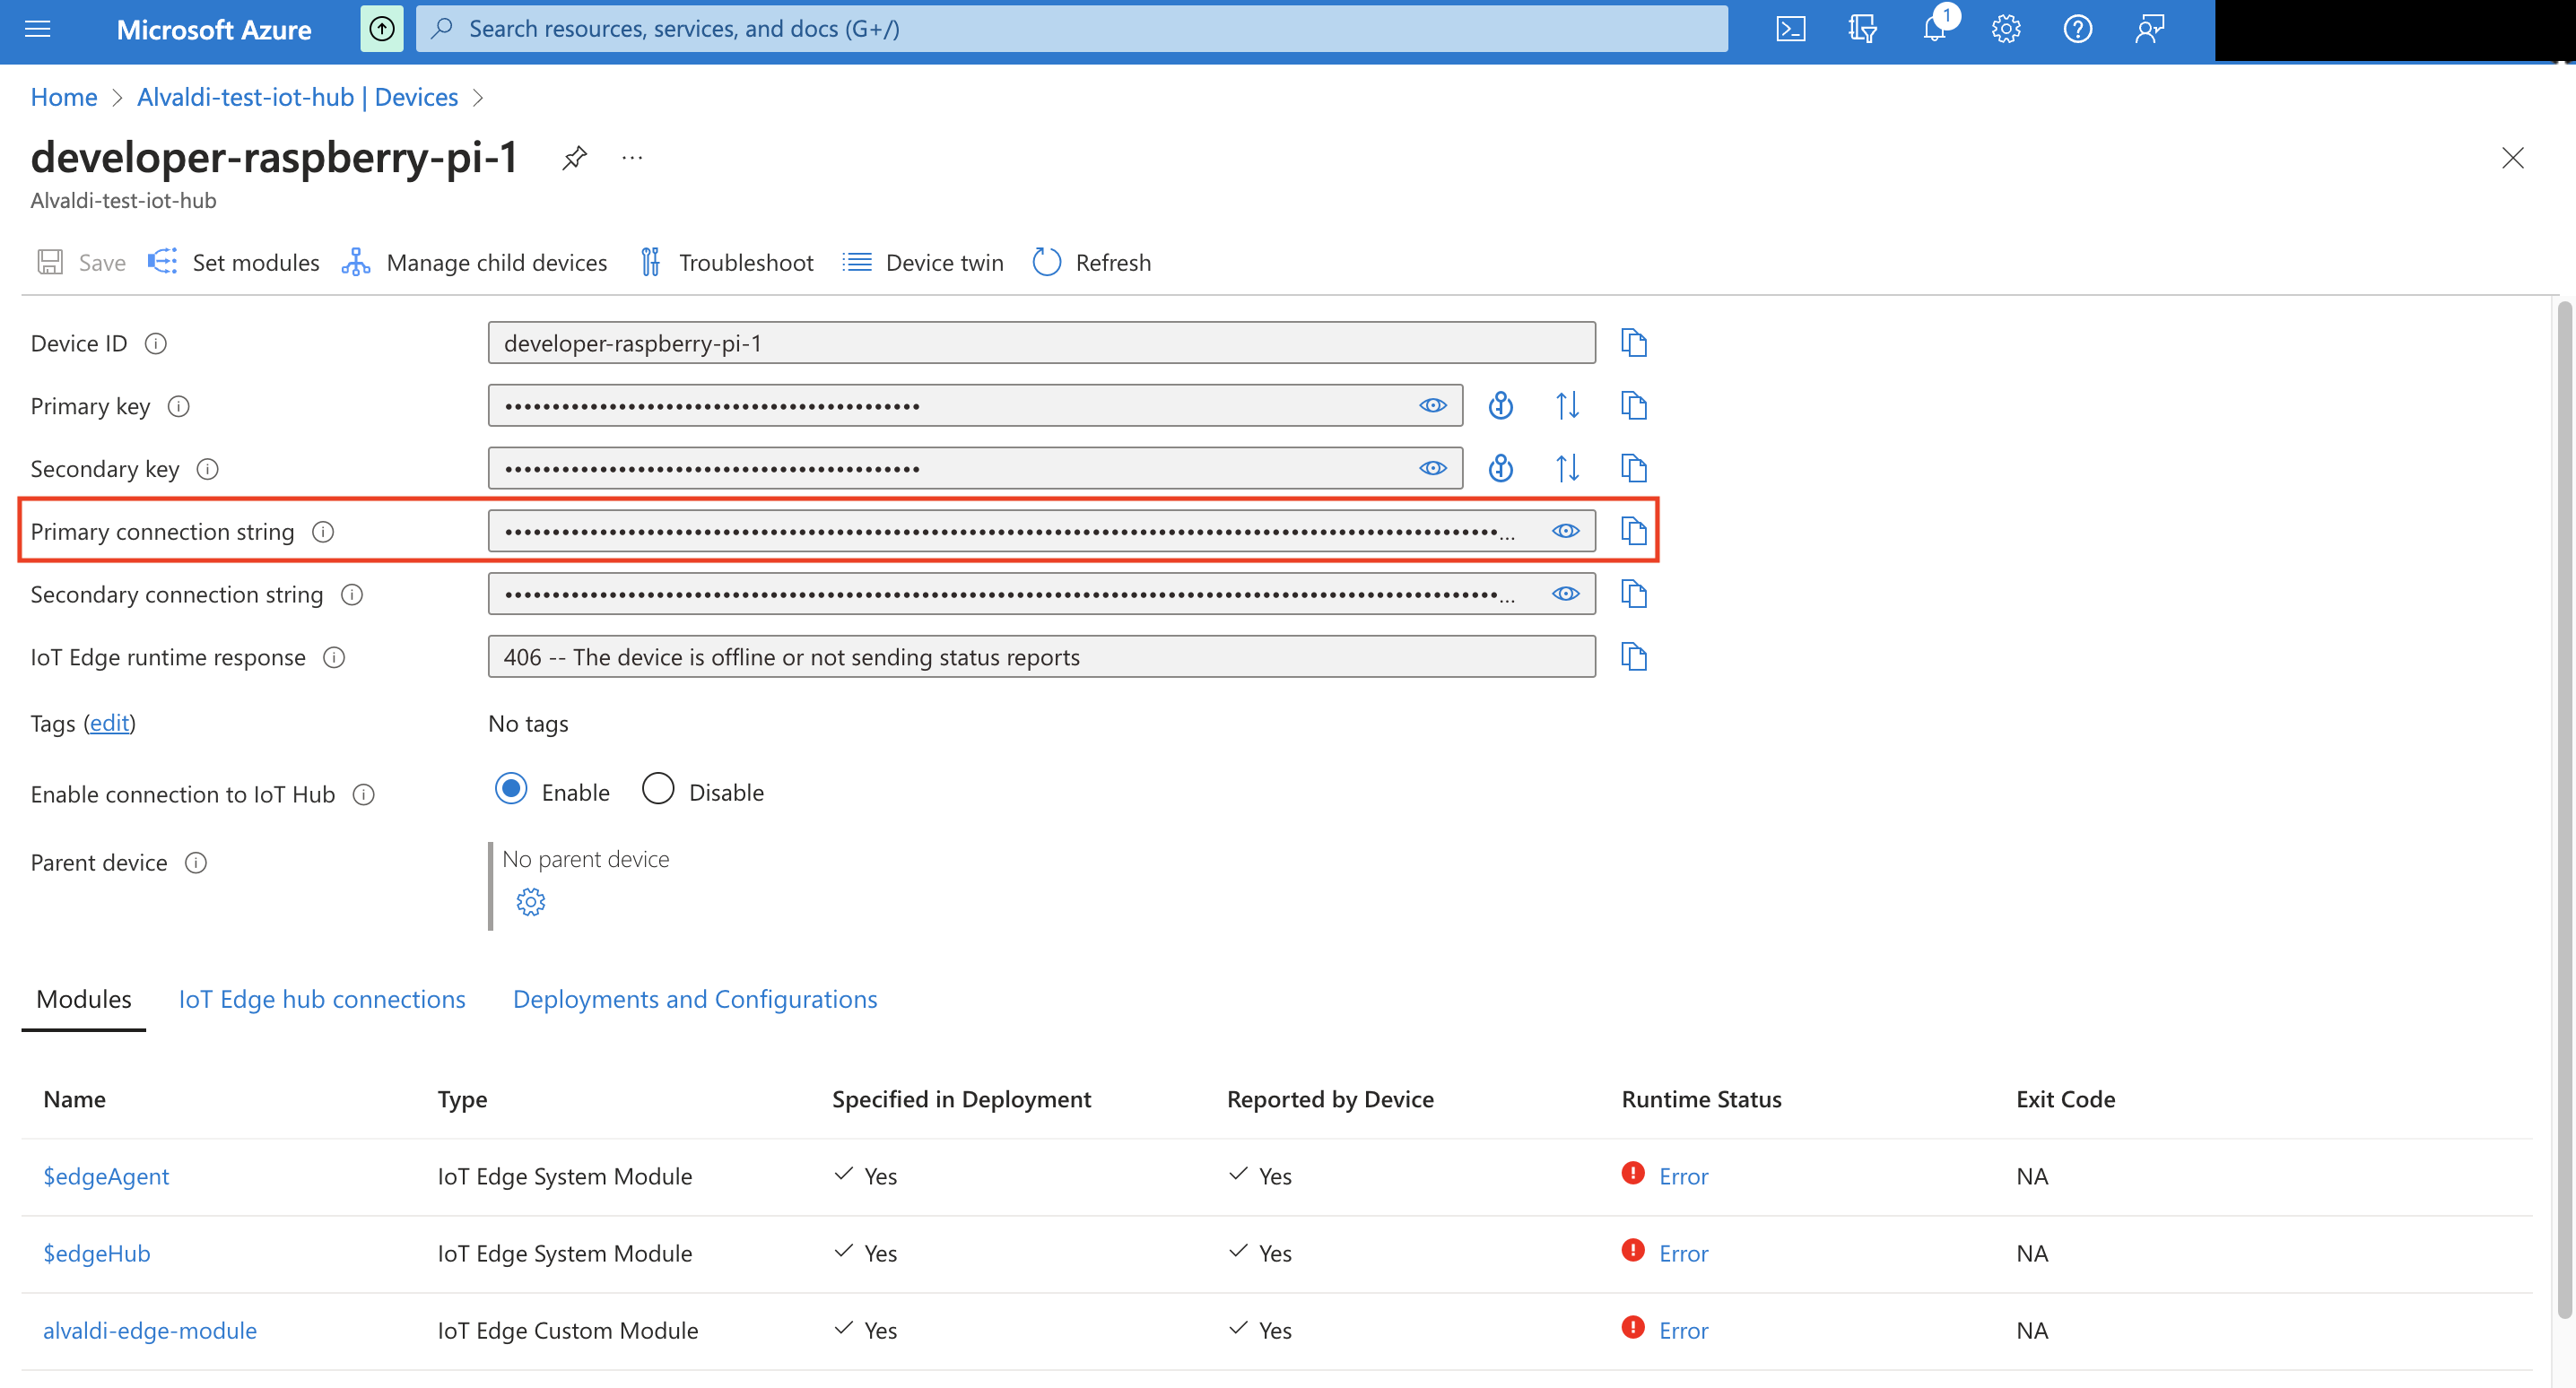
Then click on the name of the device to see the connection string among other information:
After you’ve created the device and have the connection string, this is the short version of what you need to run, on a Debian 11 device:
# Summary of Debian 11 commands from:
# https://learn.microsoft.com/en-us/azure/iot-edge/how-to-provision-single-device-linux-symmetric?view=iotedge-1.4&tabs=azure-portal%2Cubuntu

# Debian 11 - Install Microsoft's package repos:
curl https://packages.microsoft.com/config/debian/11/packages-microsoft-prod.deb > ./packages-microsoft-prod.deb
sudo apt install ./packages-microsoft-prod.deb
rm packages-microsoft-prod.deb

# Install the container runtime:
sudo apt-get update
sudo apt-get install moby-engine

# Fix DNS and logs:
sudo echo '{"log-driver": "local", "dns": ["1.1.1.1"]}' > /etc/docker/daemon.json
sudo systemctl restart docker

# Install the Azure IoT Edge client / tools:
sudo apt-get update
sudo apt-get install aziot-edge

# Configure / start the Azure IoT Edge client:
export CONNECTION_STRING="INSERT YOUR CONNECTION STRING HERE"
sudo iotedge config mp --connection-string "$CONNECTION_STRING"
sudo iotedge config apply
Important: Replace the connection string with the correct connection string for your device from Azure IoT Hub.
Assuming you’re using Debian 11 (Or Raspberry Pi OS based on Debian 11), this script summarizes the commands from the official documentation:
Following the tutorial linked above will leave you with one problem once done, DNS is not working. This is mentioned in another Azure documentation article:
In short, you need to add a DNS server to /etc/docker/daemon.json.
Which we have in the script above.
Did it work?
After following the tutorial above, or running the script, your device should be showing up in IoT Hub, and ready to receive IoT Edge modules. On the device, you can see the running containers with:
docker psSee the status of Azure IoT Edge modules with:
iotedge system statusAnd run the check command to look for potential issues:
iotedge checkErrors
Unfortunately, errors are quite common in the Azure IoT Hub UI, even when nothing is wrong. If you see errors, wait some minutes and it might resolve itself.
Deploy module(s)
To test / have some assurance that everything is working, we recommend doing 2 simple deployments.
In Azure, find your IoT Hub, then the IoT Edge category in the left navigation bar, and your device in the list of devices:
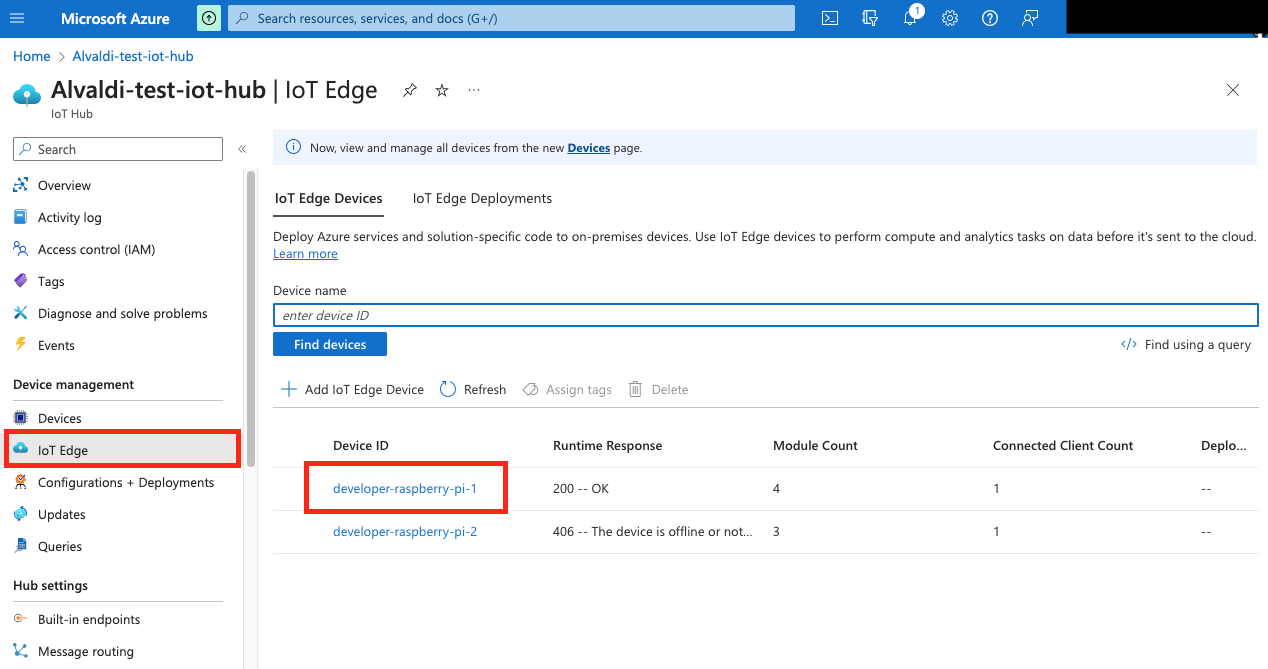
Click on the device and then Set modules:
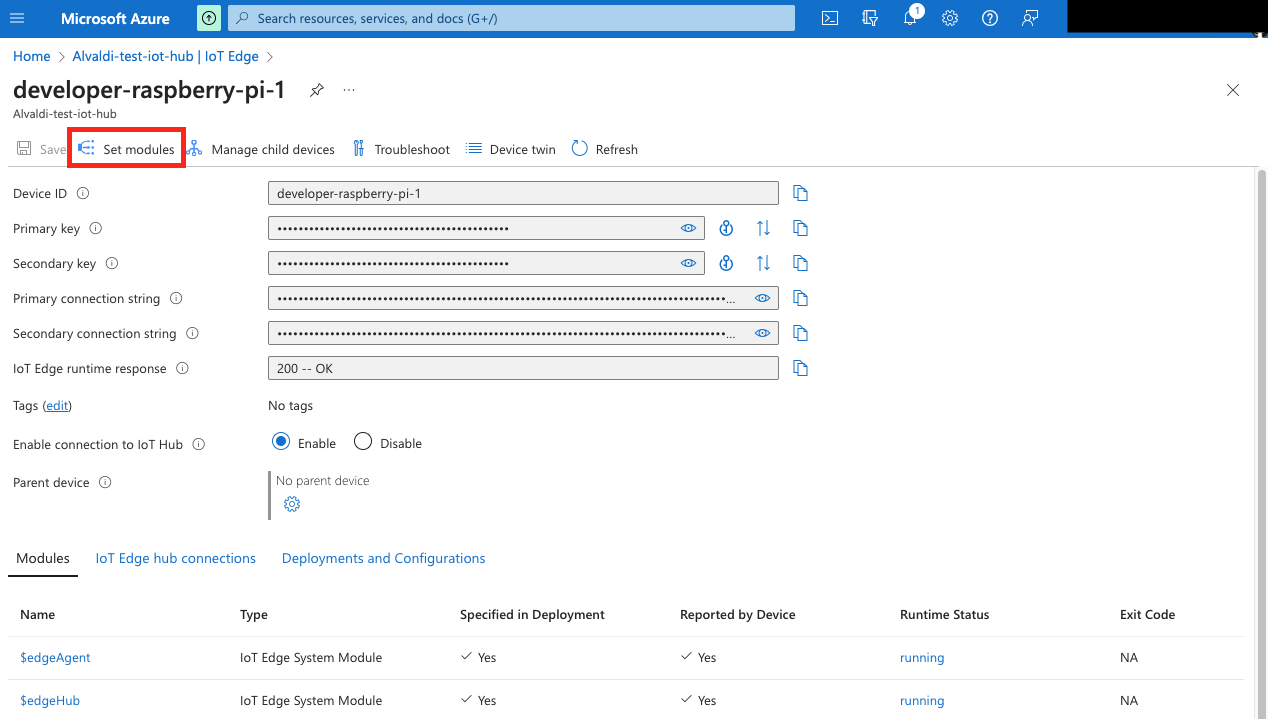
Don’t add any modules, just click Review + create, and the Create to deploy the default modules (which should already be there).
Once done, and any transient errors disappear, go through the same process one more time, but this time add a module. (Click device, Set modules, Add module, search for Simulated temperature sensor by Microsoft, Add, Review + create, Create).
When the SimulatedTemperatureSensor shows up as running in the modules of the device, you can click running to see the simulated temperature log messages coming from the device.
What’s next?
You now have everything you need and are ready to get started with Alvaldi!
Still need help?
 Contact us