Setup with Azure
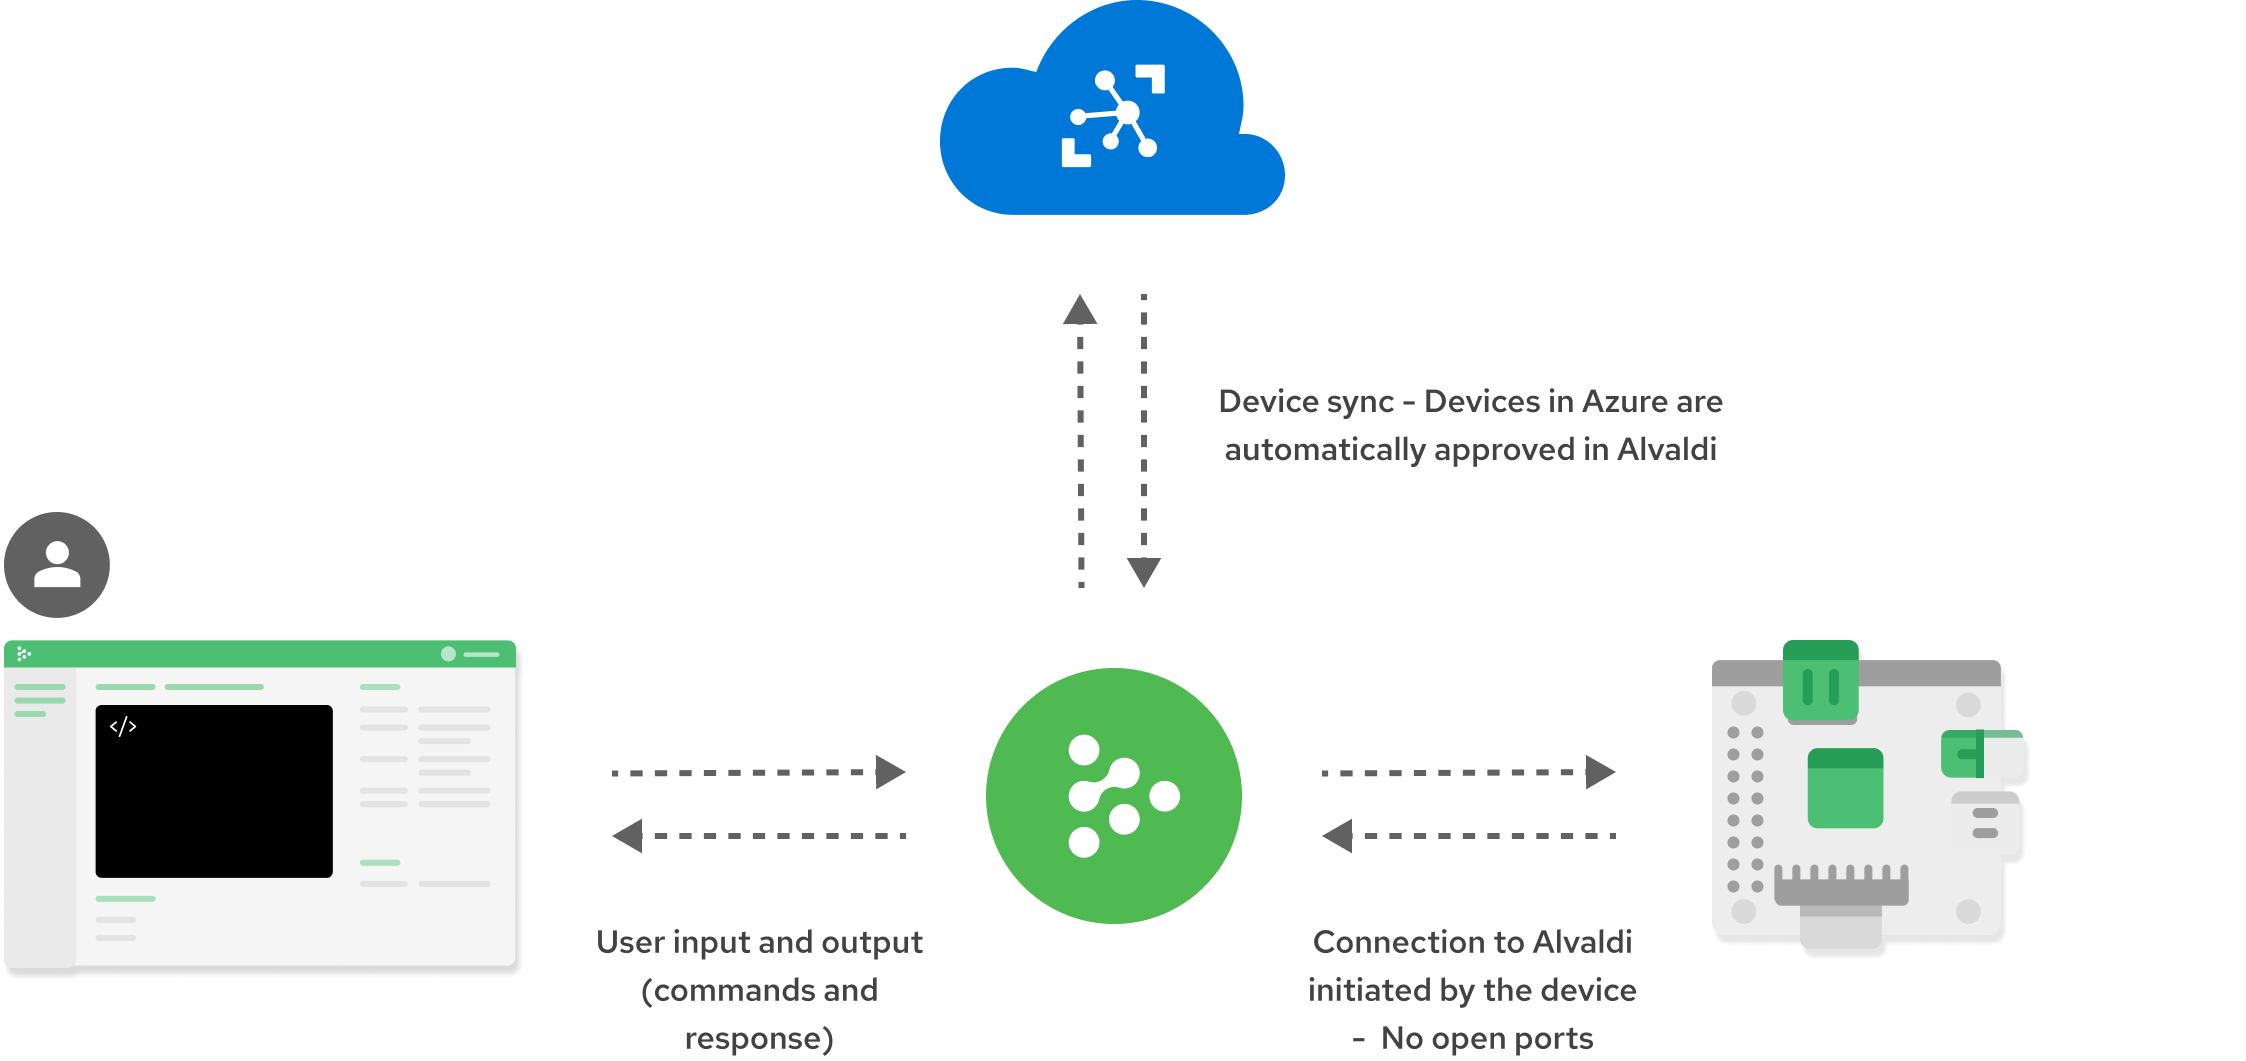
With our Azure IoT Hub integration, and Azure IoT Edge module, it’s easy to deploy Alvaldi to devices, and have your device list automatically synchronized with Alvaldi;
In this tutorial, we assume that you’re already using Azure IoT Hub and Azure IoT Edge. If you need help with using Azure IoT Hub / IoT Edge for the first time, take a look at our Azure IoT Edge quickstart.
There are 3 short steps you need to complete to set up Alvaldi before using it for the first time:
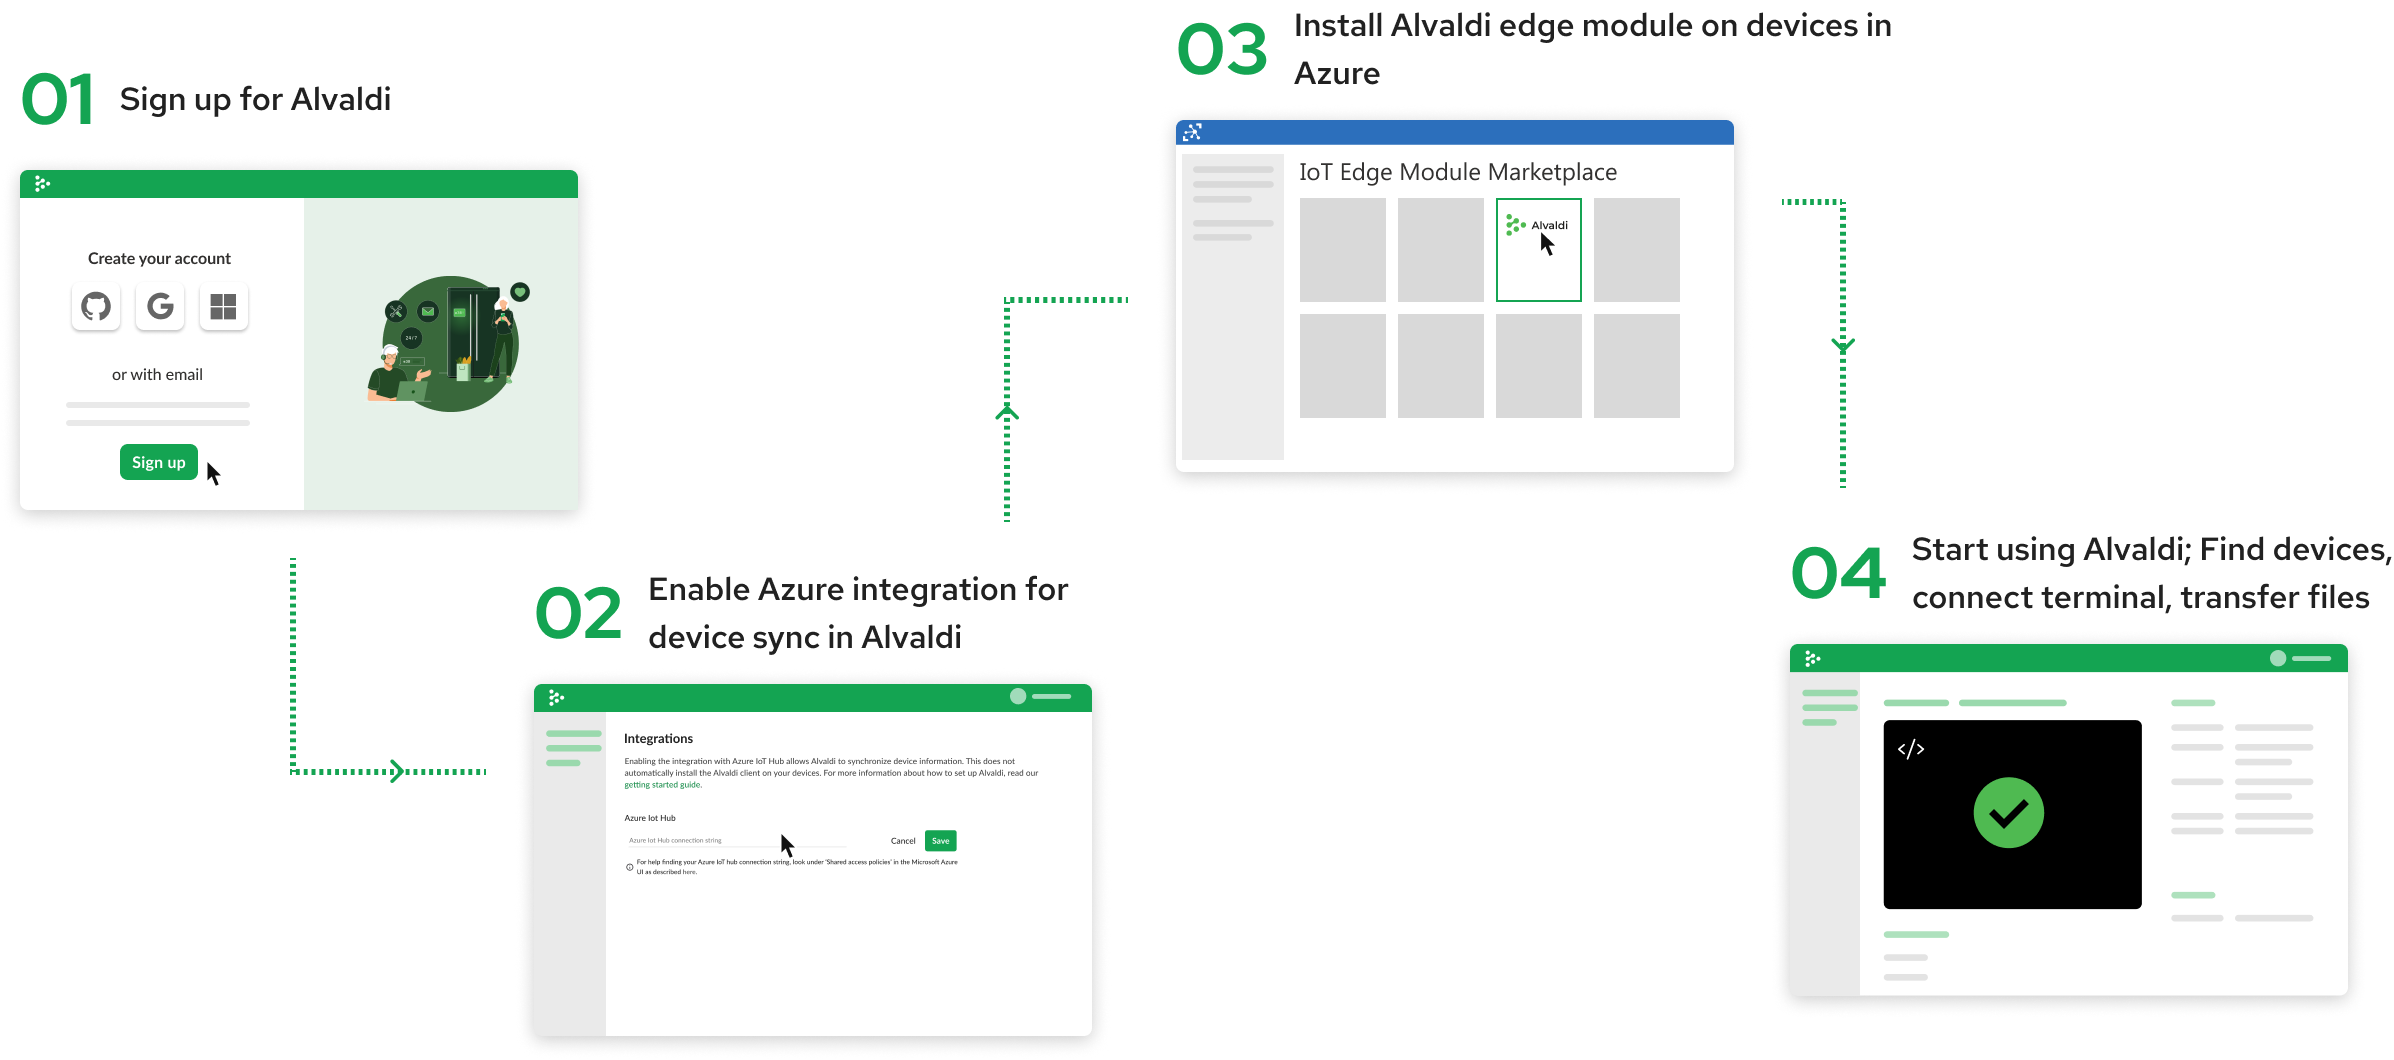
In short, to set it up, you need to:
- Create an Alvaldi account.
- Enable the Azure IoT Hub integration.
- Install the Azure IoT Edge module on your devices.
At that point, you’re ready to start using Alvaldi, seeing device information, creating terminal sessions and transferring files.
Step 1 - Create an Alvaldi account
You create an account via the signup page:
https://app.alvaldi.com/ui/signup
We recommend signing up using the Microsoft button, authenticating with your existing Microsoft account. This will ease upgrade later - your Microsoft account can be automatically upgraded to a paid plan in the Azure Marketplace.
Step 2 - Enable the Azure IoT Hub integration
When you log in for the first time, you will get a modal window guiding you to the next step:
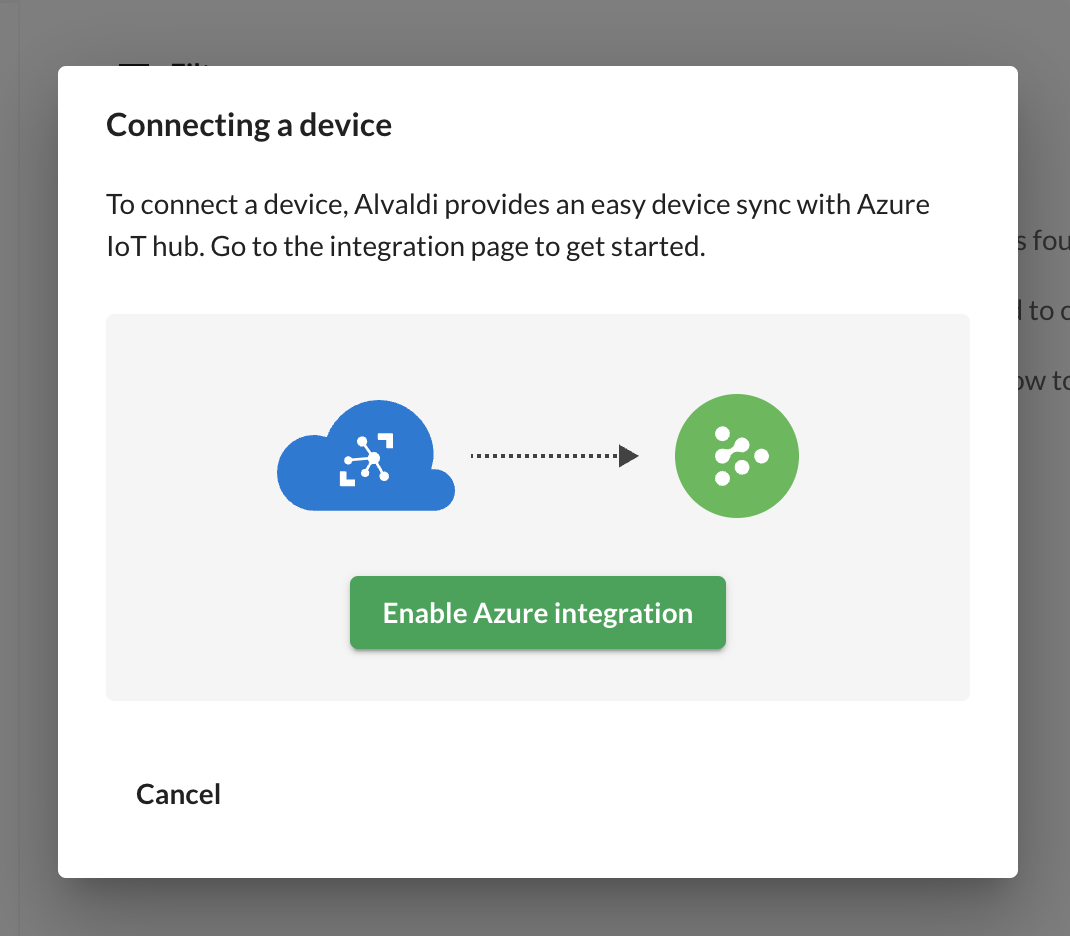
Click the button, or navigate there manually via Settings -> Integrations.
Here you will need to enter the connection string from your IoT Hub, in Azure. It can be found inside the policy you wish to use, under Shared access policies inside the IoT Hub:
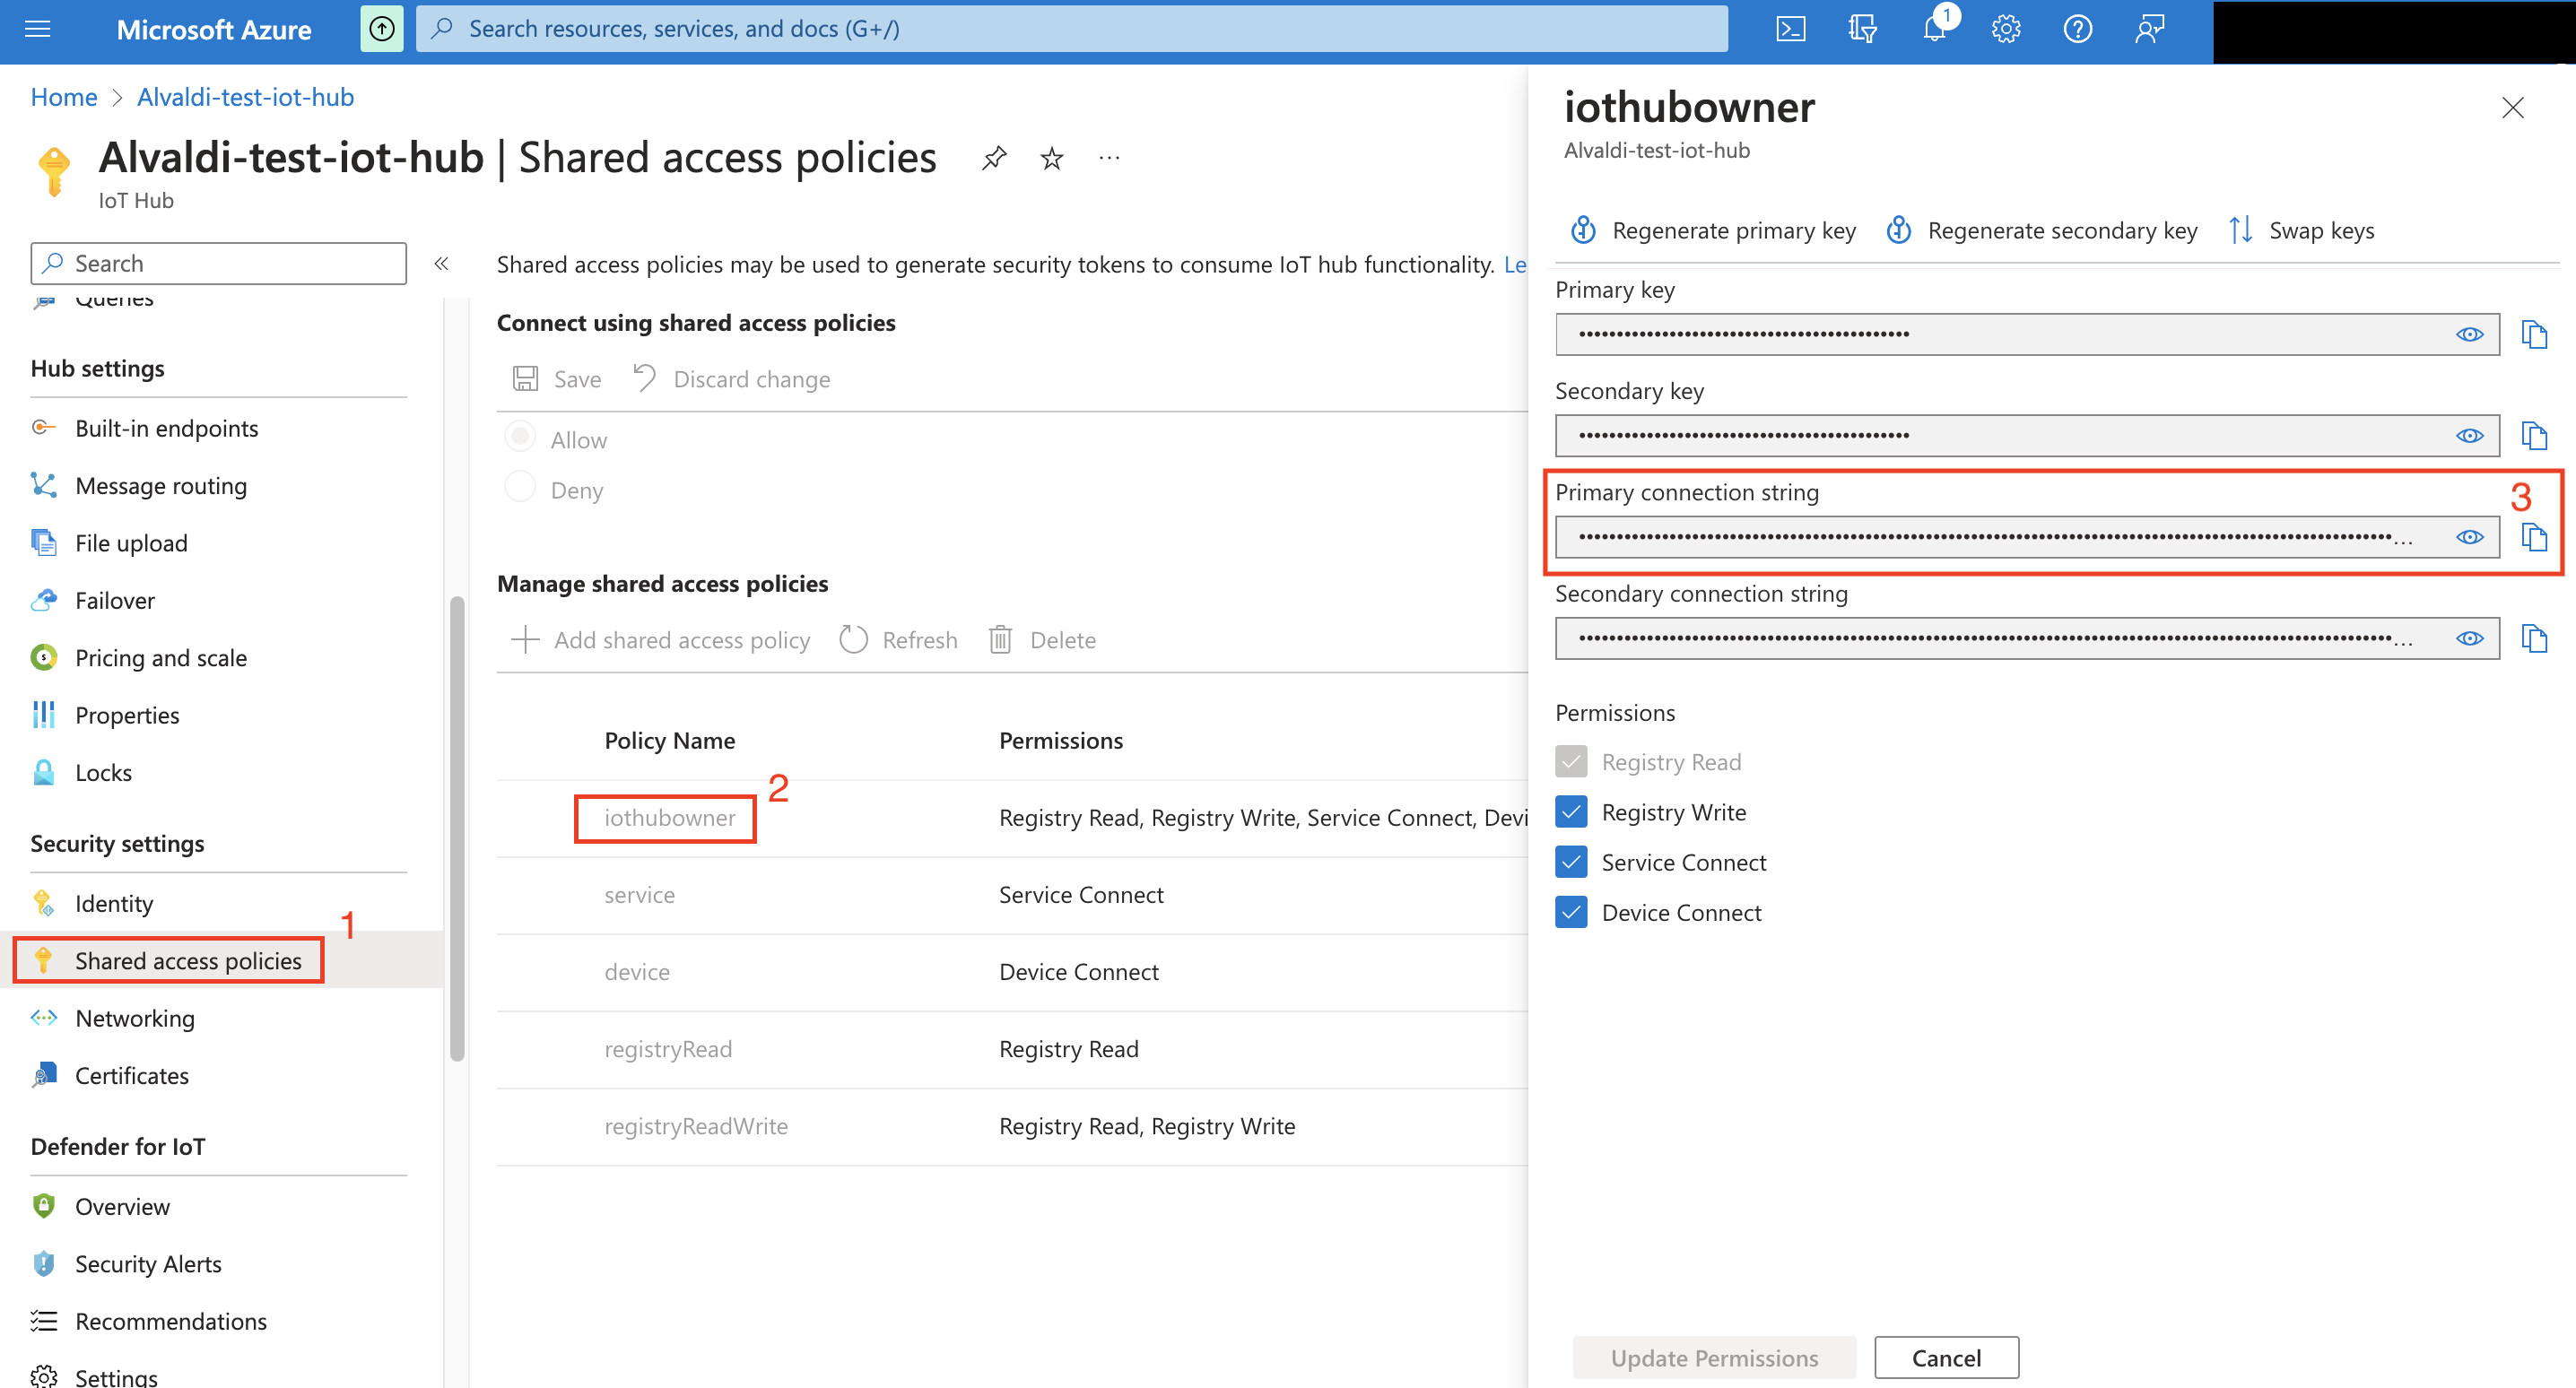
Copy the connection string from your IoT Hub in Azure, to the text field in Alvaldi and press Save.
Device identities are now synchronized with Azure; when a device connects to Alvaldi it will be automatically approved. Now we need to install the client on device(s) - the Azure IoT Edge module.
Step 3 - Installing the Azure IoT Edge module
Your devices will not show up in Alvaldi until you install the client on them (the Alvaldi IoT Edge module). When installing the module, your devices need to know which Alvaldi account to connect to. In your Alvaldi account, go to Settings, and then Organization and billing:
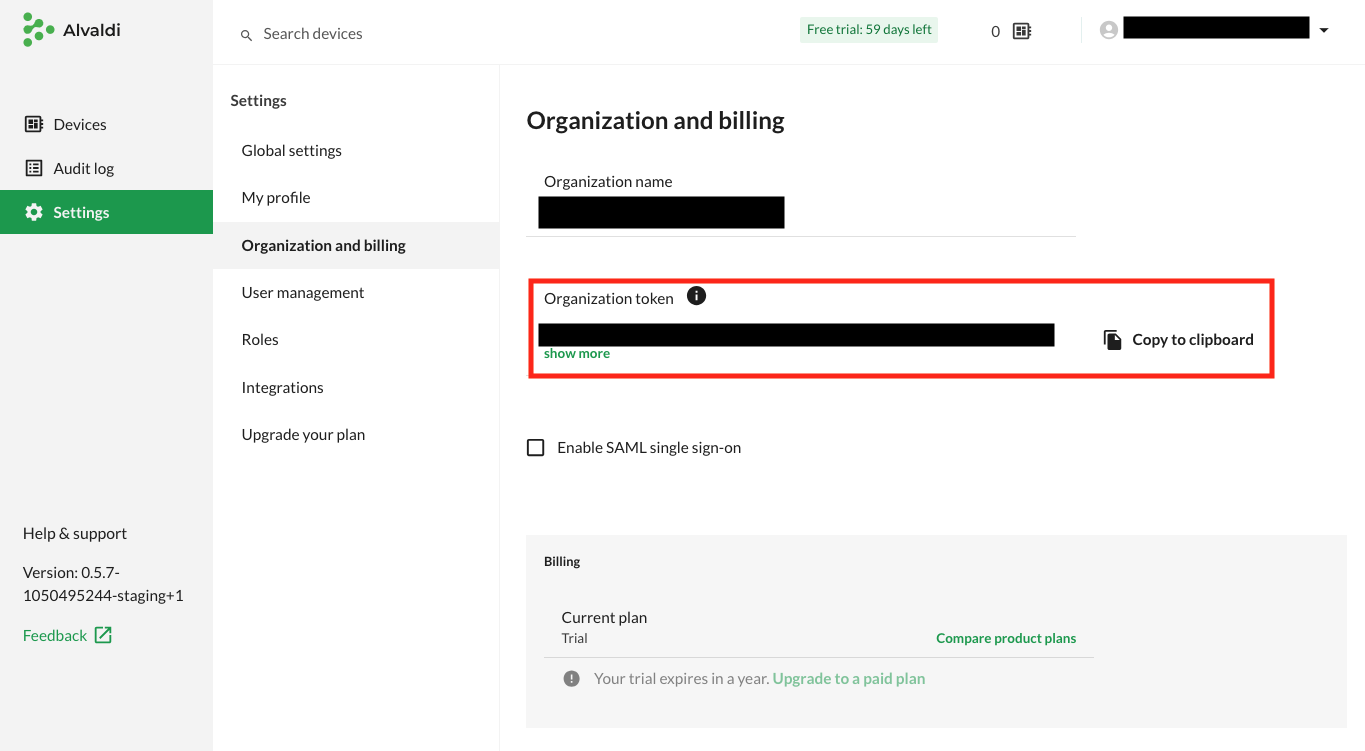
There you will see your Organization token (Tenant token). Keep this window / tab open, you will need to copy the token soon.
Find the Alvaldi edge module in the Azure marketplace:
https://azuremarketplace.microsoft.com/en-us/marketplace/apps?search=alvaldi-edge-module&page=1
Note: We have 2 products listed on the Azure marketplace: Alvaldi for subscribing to a paid plan of Alvaldi via Azure, and Alvaldi edge module for installing the client on your Azure IoT Edge devices.
Click on Get it now and Continue to start the process of deploying the module. You’ll be redirected to the Azure Portal UI, letting you specify the device(s):
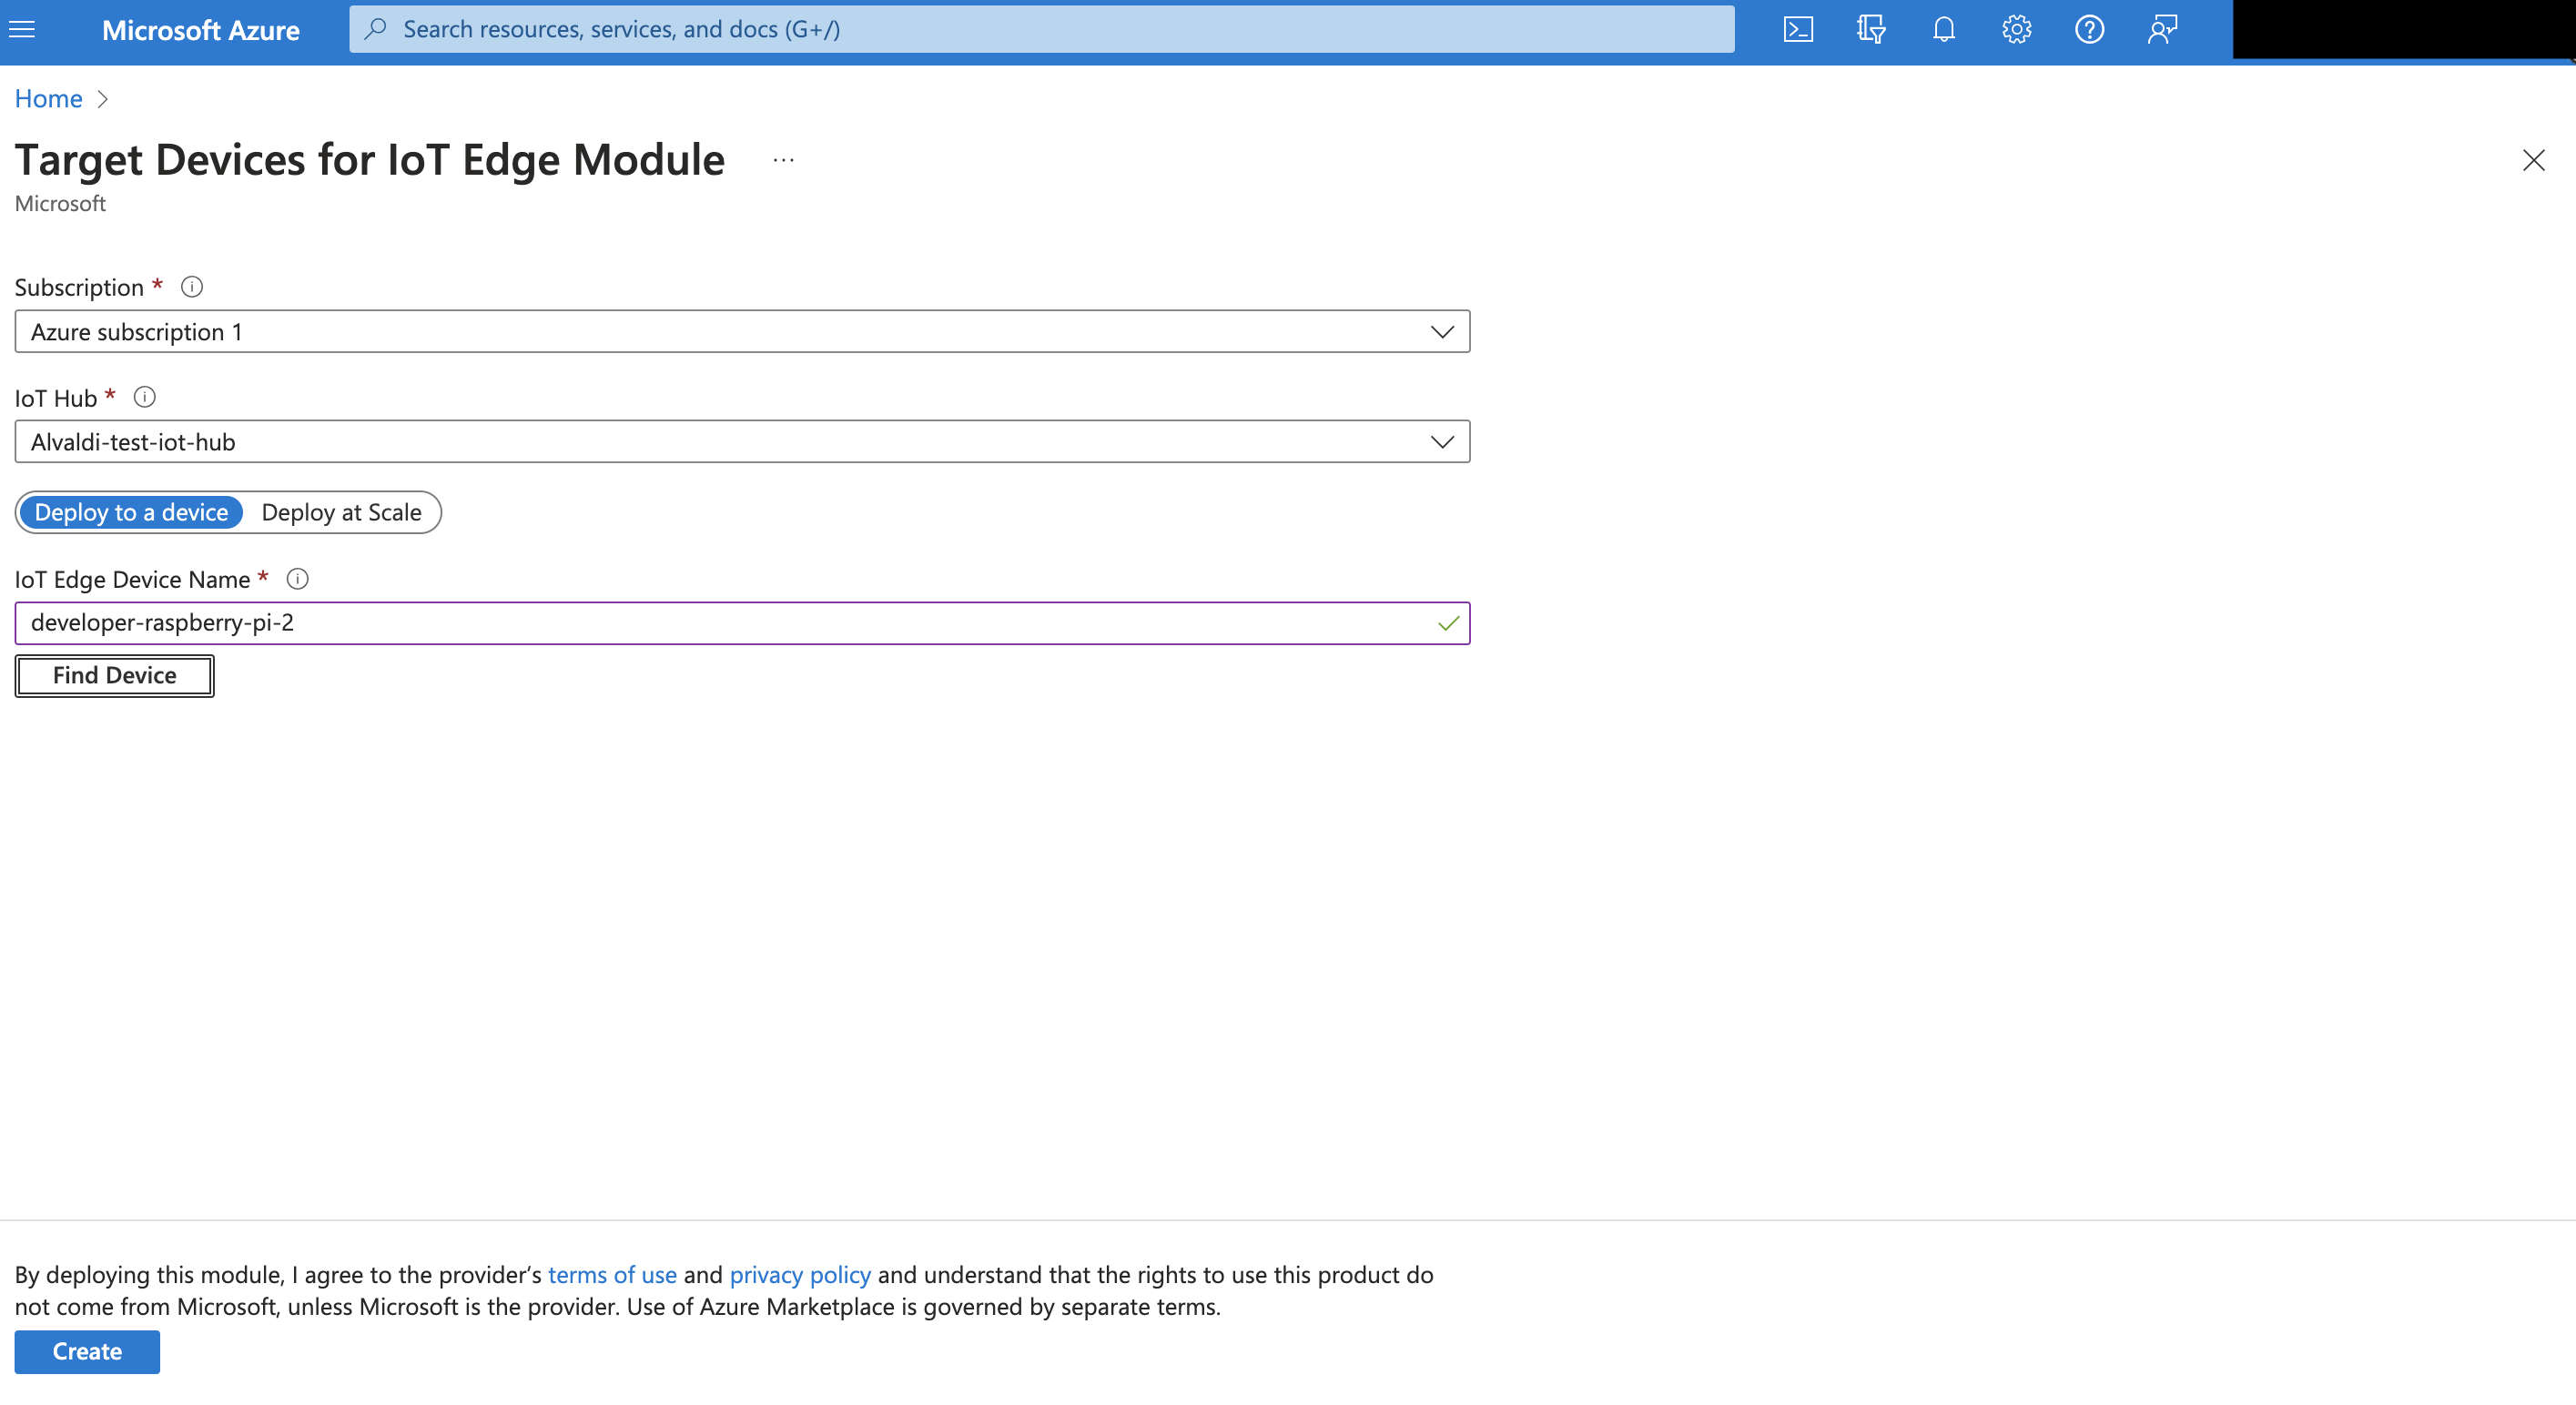
Enter the IoT Edge device name or use the Find Device button if you don’t remember it. Continue by clicking Create once, but do not click the next Review + create button yet.
We first have to enter the Alvaldi tenant token - Click the name of the module (Alvaldiedgemodule) in order to edit it. Go to the Environment Variables tab, and paste the tenant token from above (from Alvaldi settings) into the 3rd value:
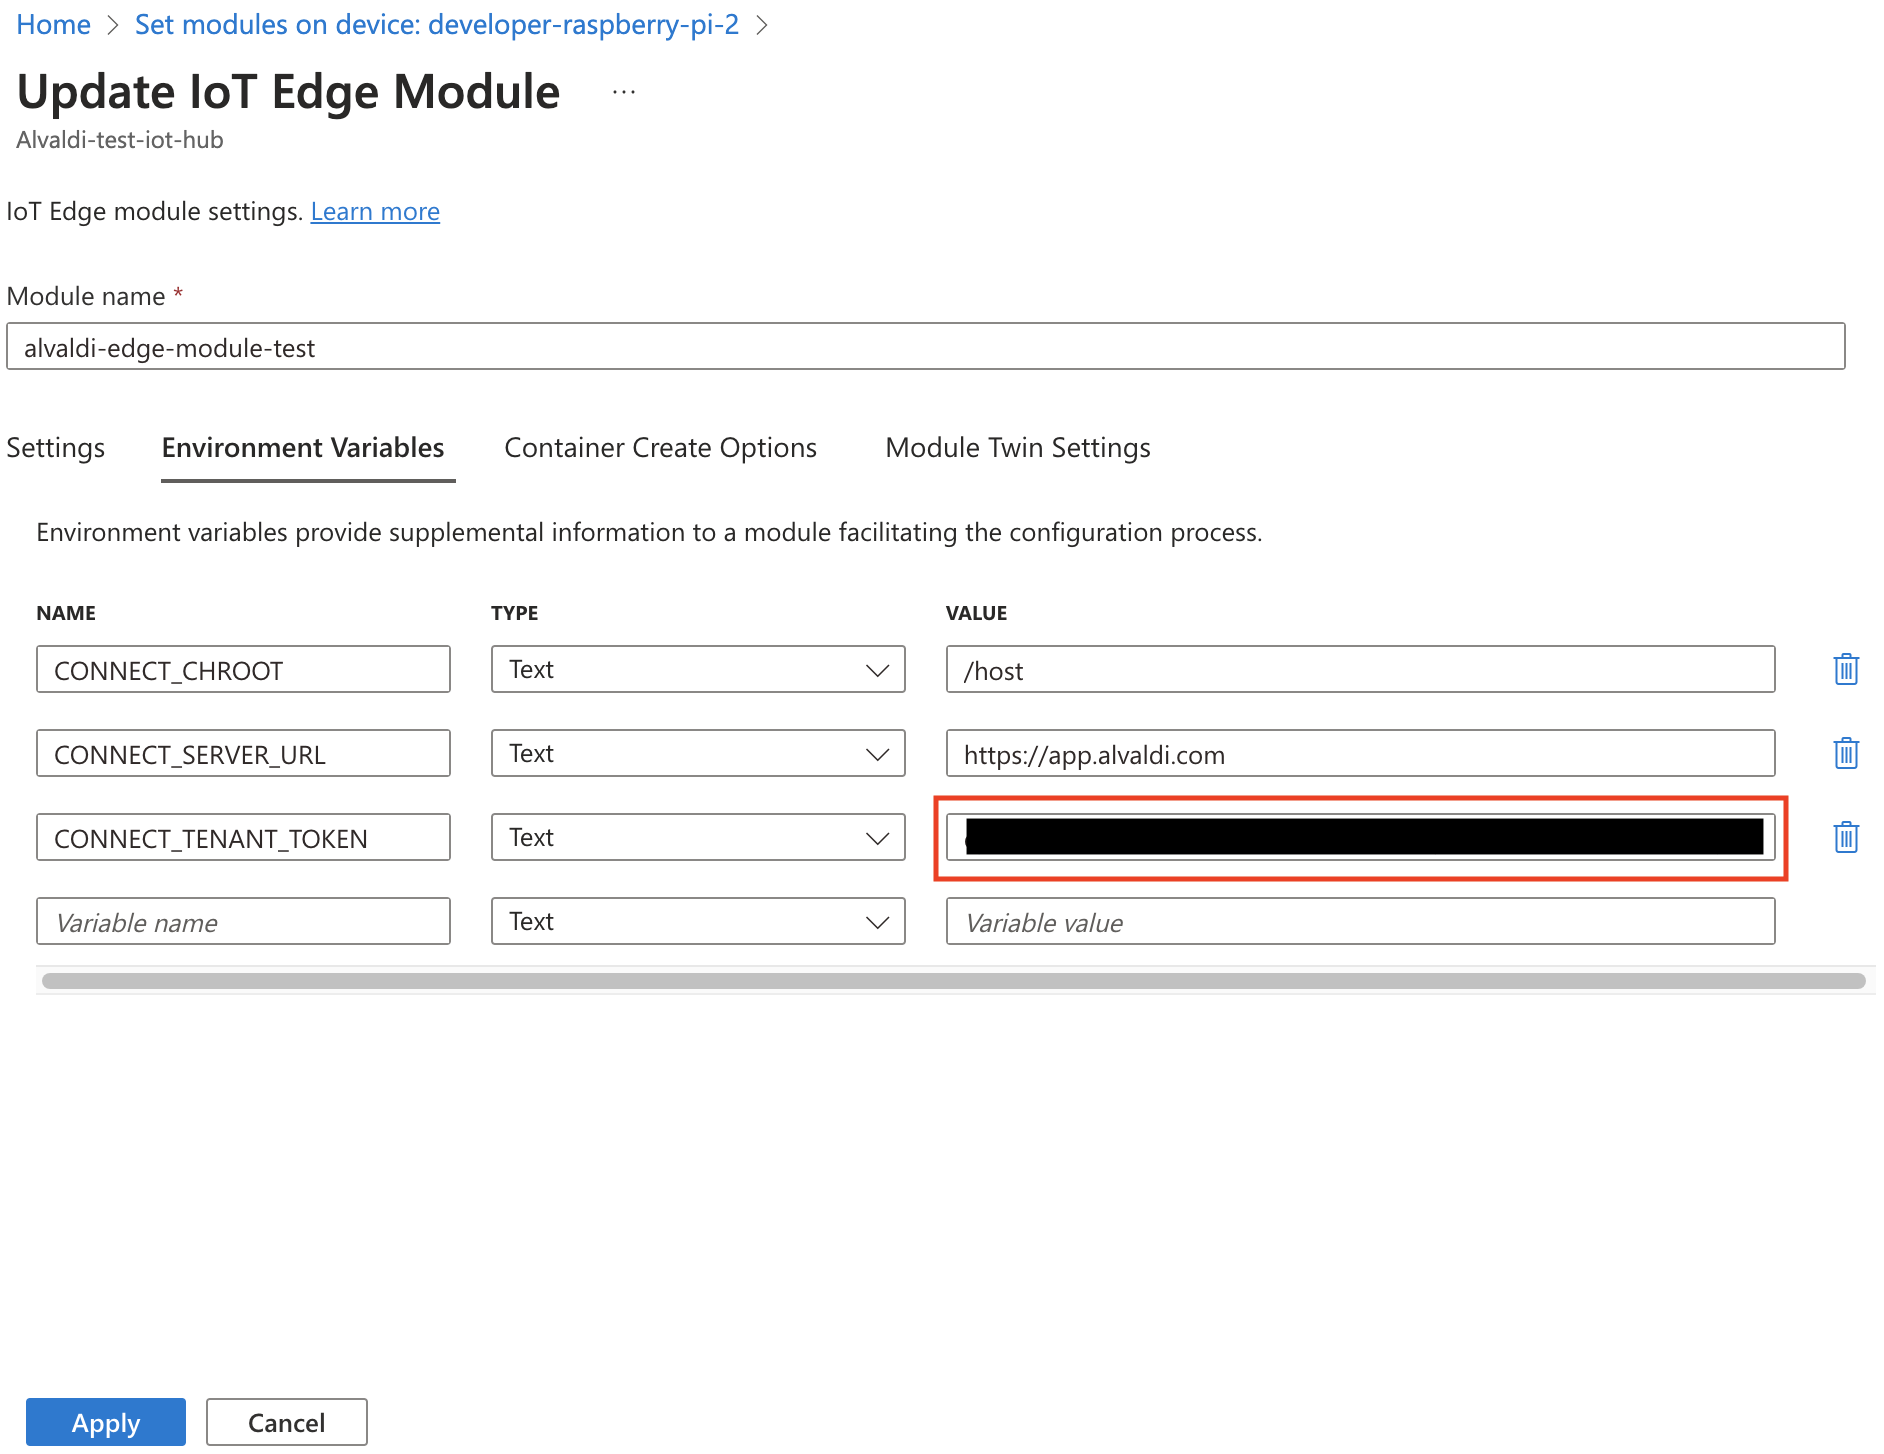
You can also change the name, if you want. Once done, you can click Apply, then Review + create, and Create to deploy the module.
The device shows up
After the module has been successfully deployed, your device should show up in Alvaldi:
https://app.alvaldi.com/ui/devices
Up next
The next part of the getting started series is:
Still need help?
 Contact us