Setup
There are 3 short steps you need to complete to set up Alvaldi before using it for the first time:
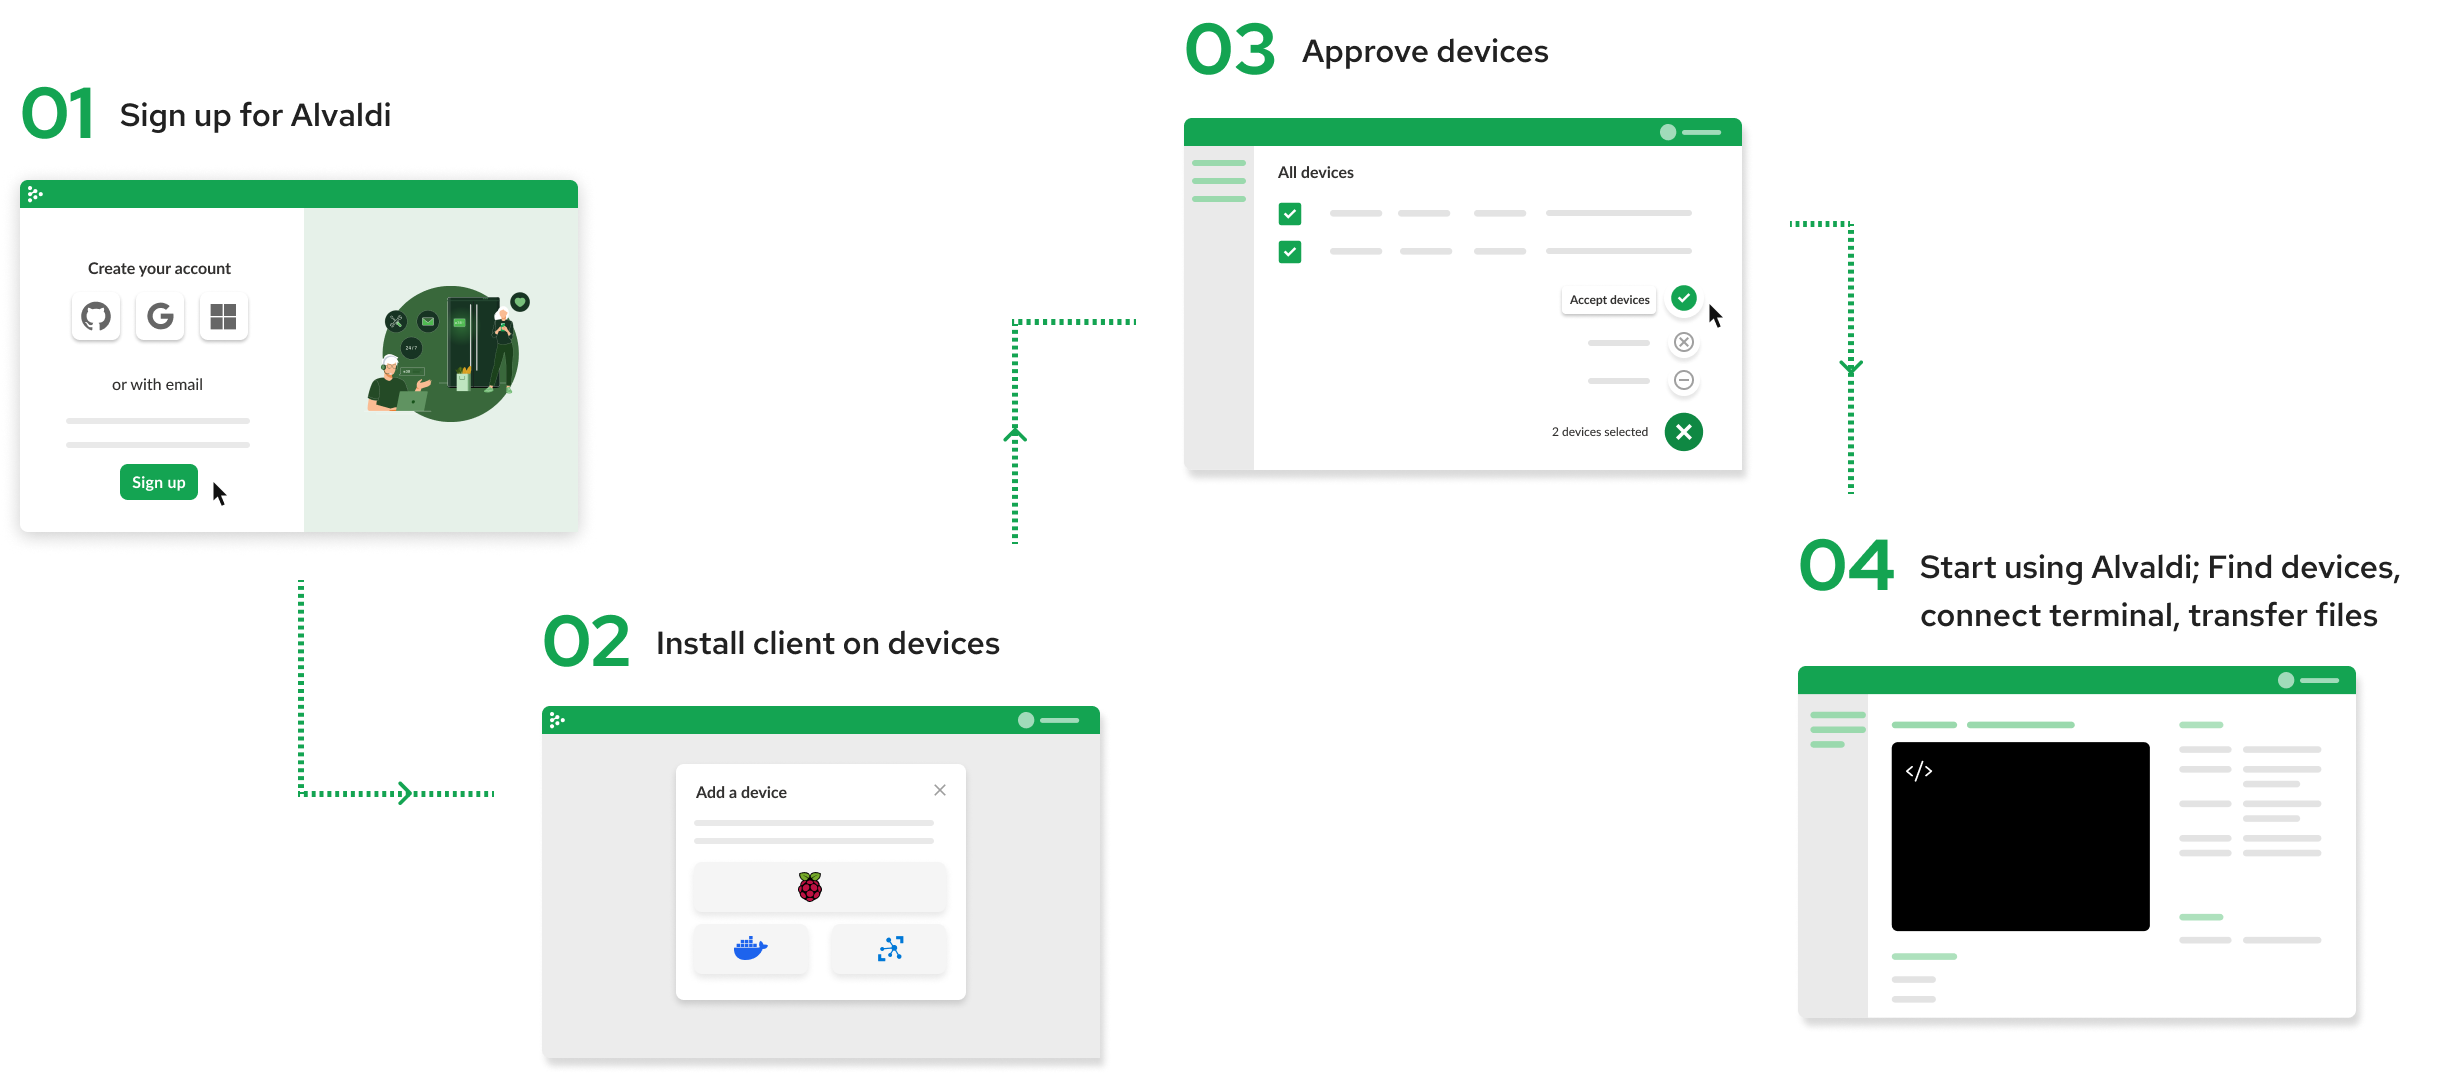
In short, to set it up, you need to:
- Create an Alvaldi account.
- Install the Alvaldi client on your device.
- Approve the device in the UI.
At that point, you’ll be ready to start using Alvaldi, seeing device information, creating terminal sessions and transferring files.
If you are using Azure IoT Hub and Azure IoT Edge, see our dedicated tutorial for setting up Alvaldi with the Azure IoT Edge module.
Step 1 - Create an Alvaldi account
You create an account via the signup page:
https://app.alvaldi.com/ui/signup
Step 2 - Install the client on your device
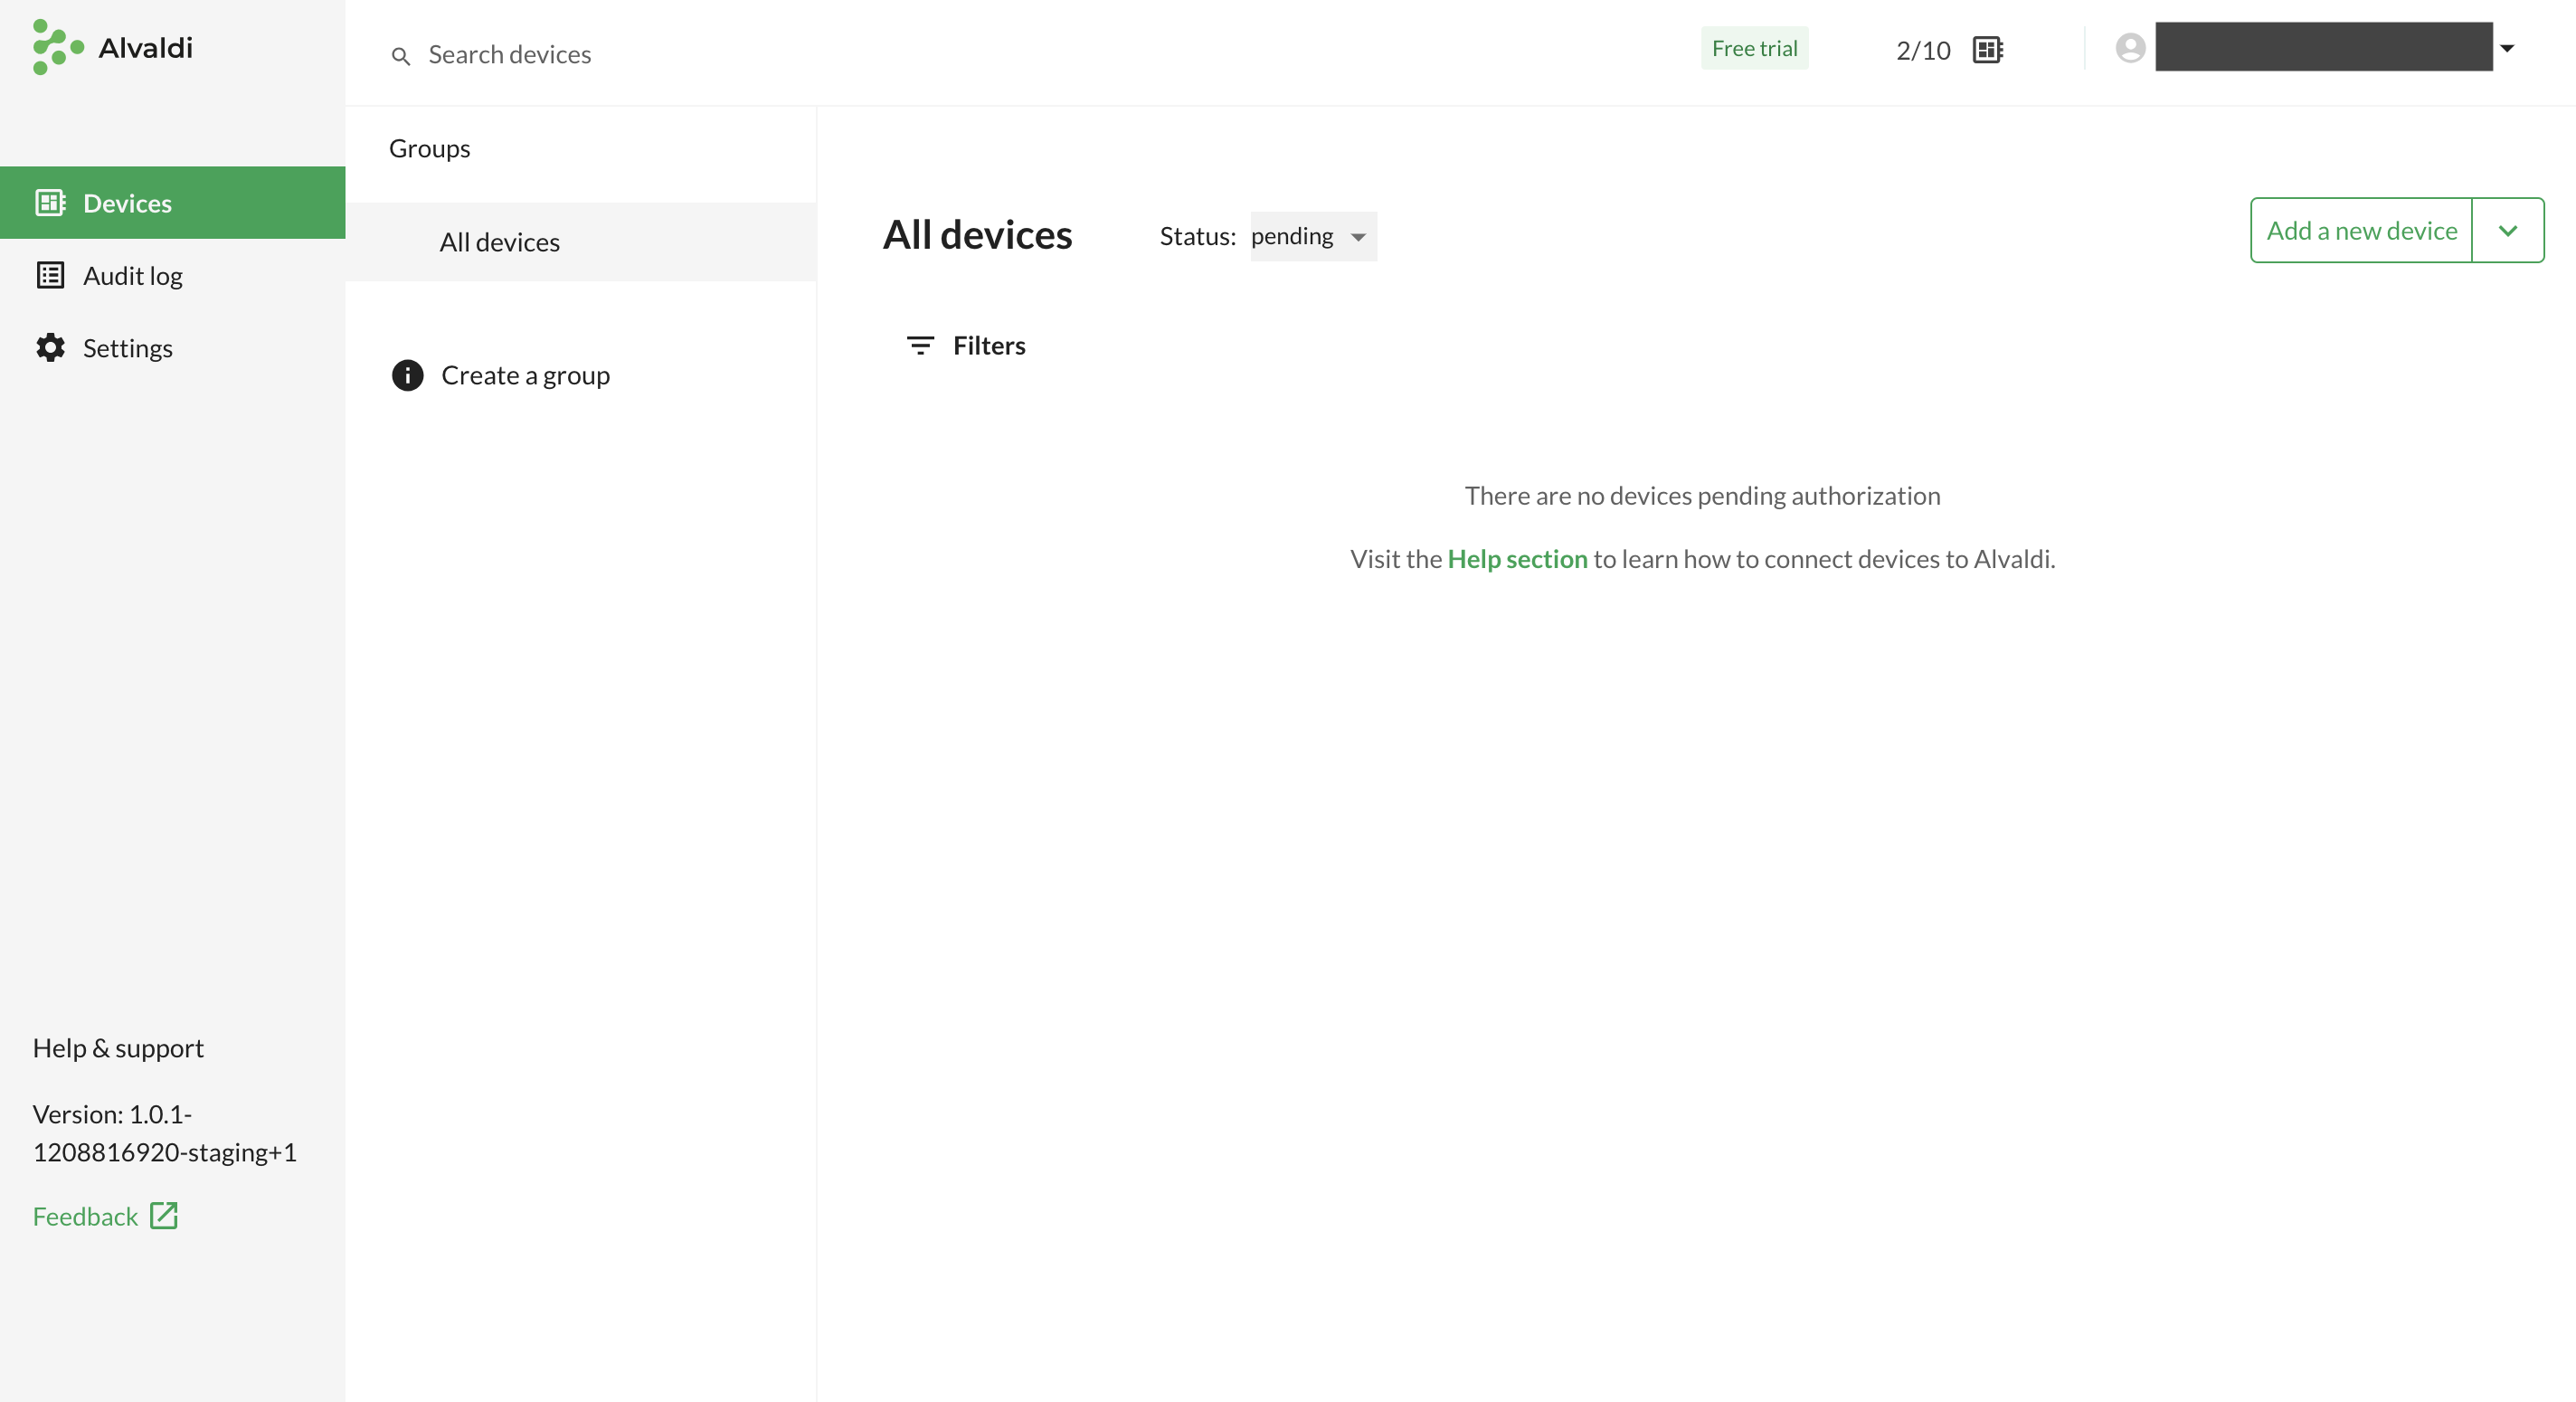
After signing up / logging in, you will see the device list. A first time user will see an empty list, since you haven’t added any devices. Click on the Add a new device button in the top right corner:
The Add a device modal window shows you the different options for installing the client on your device:
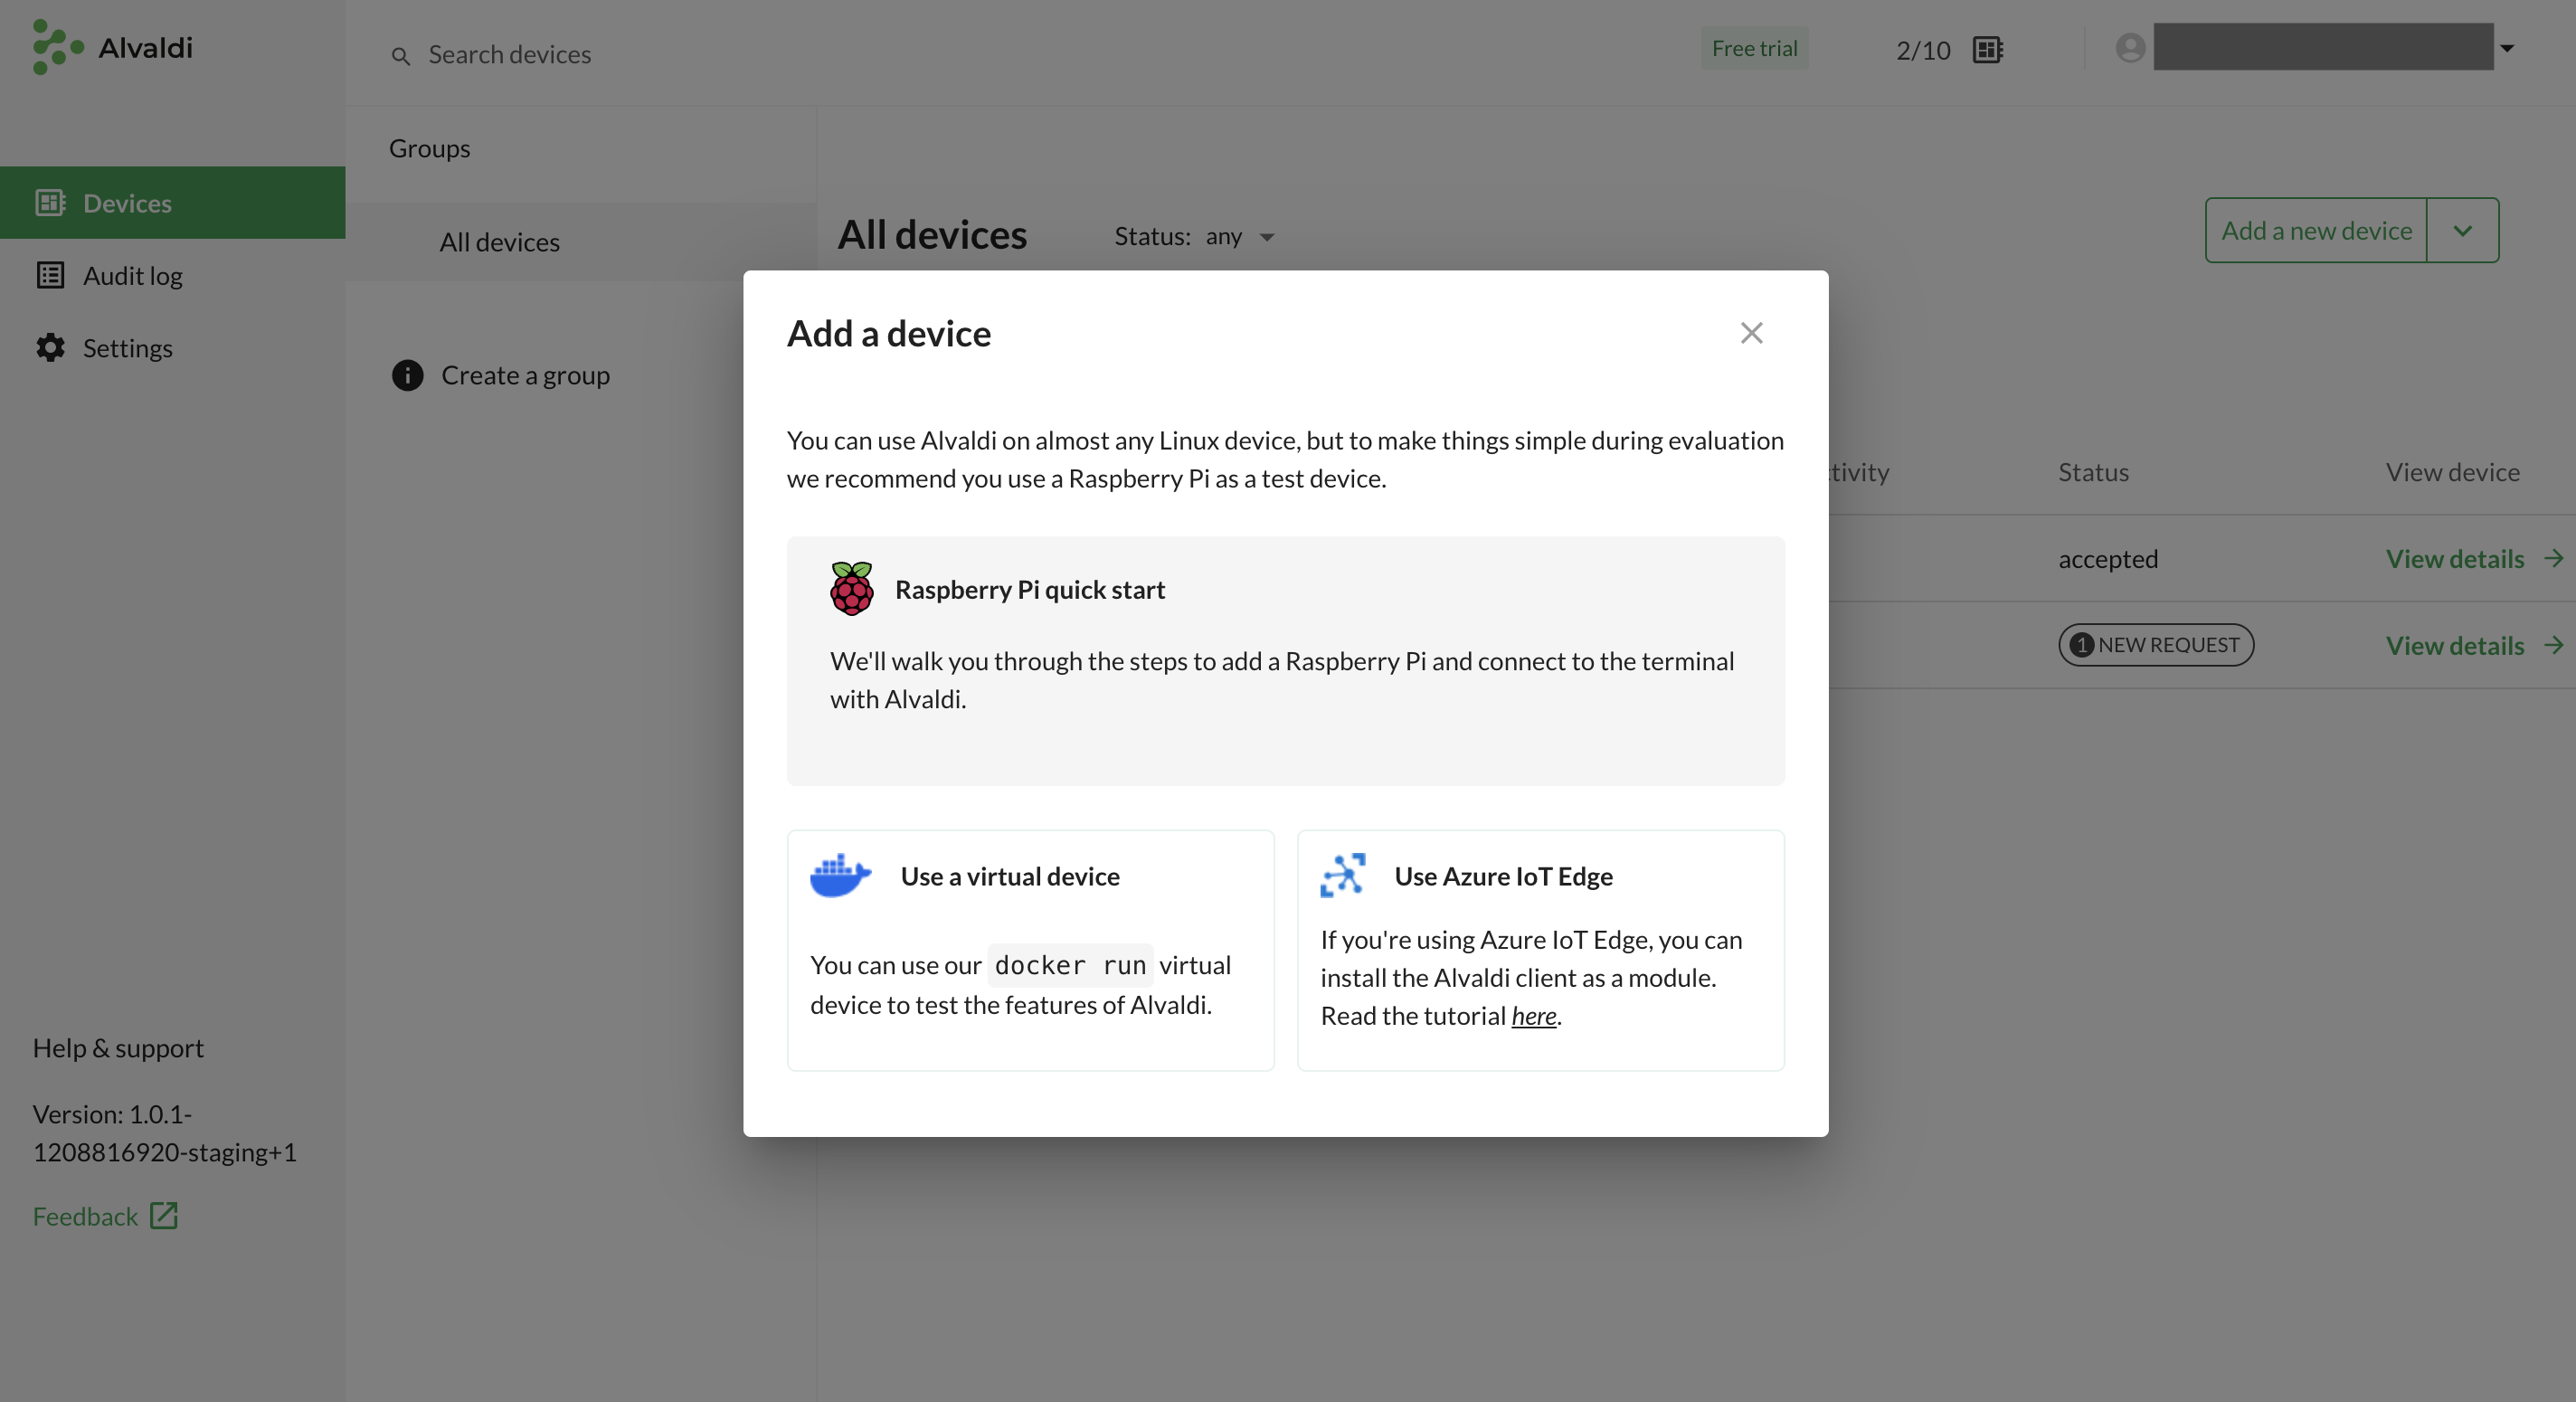
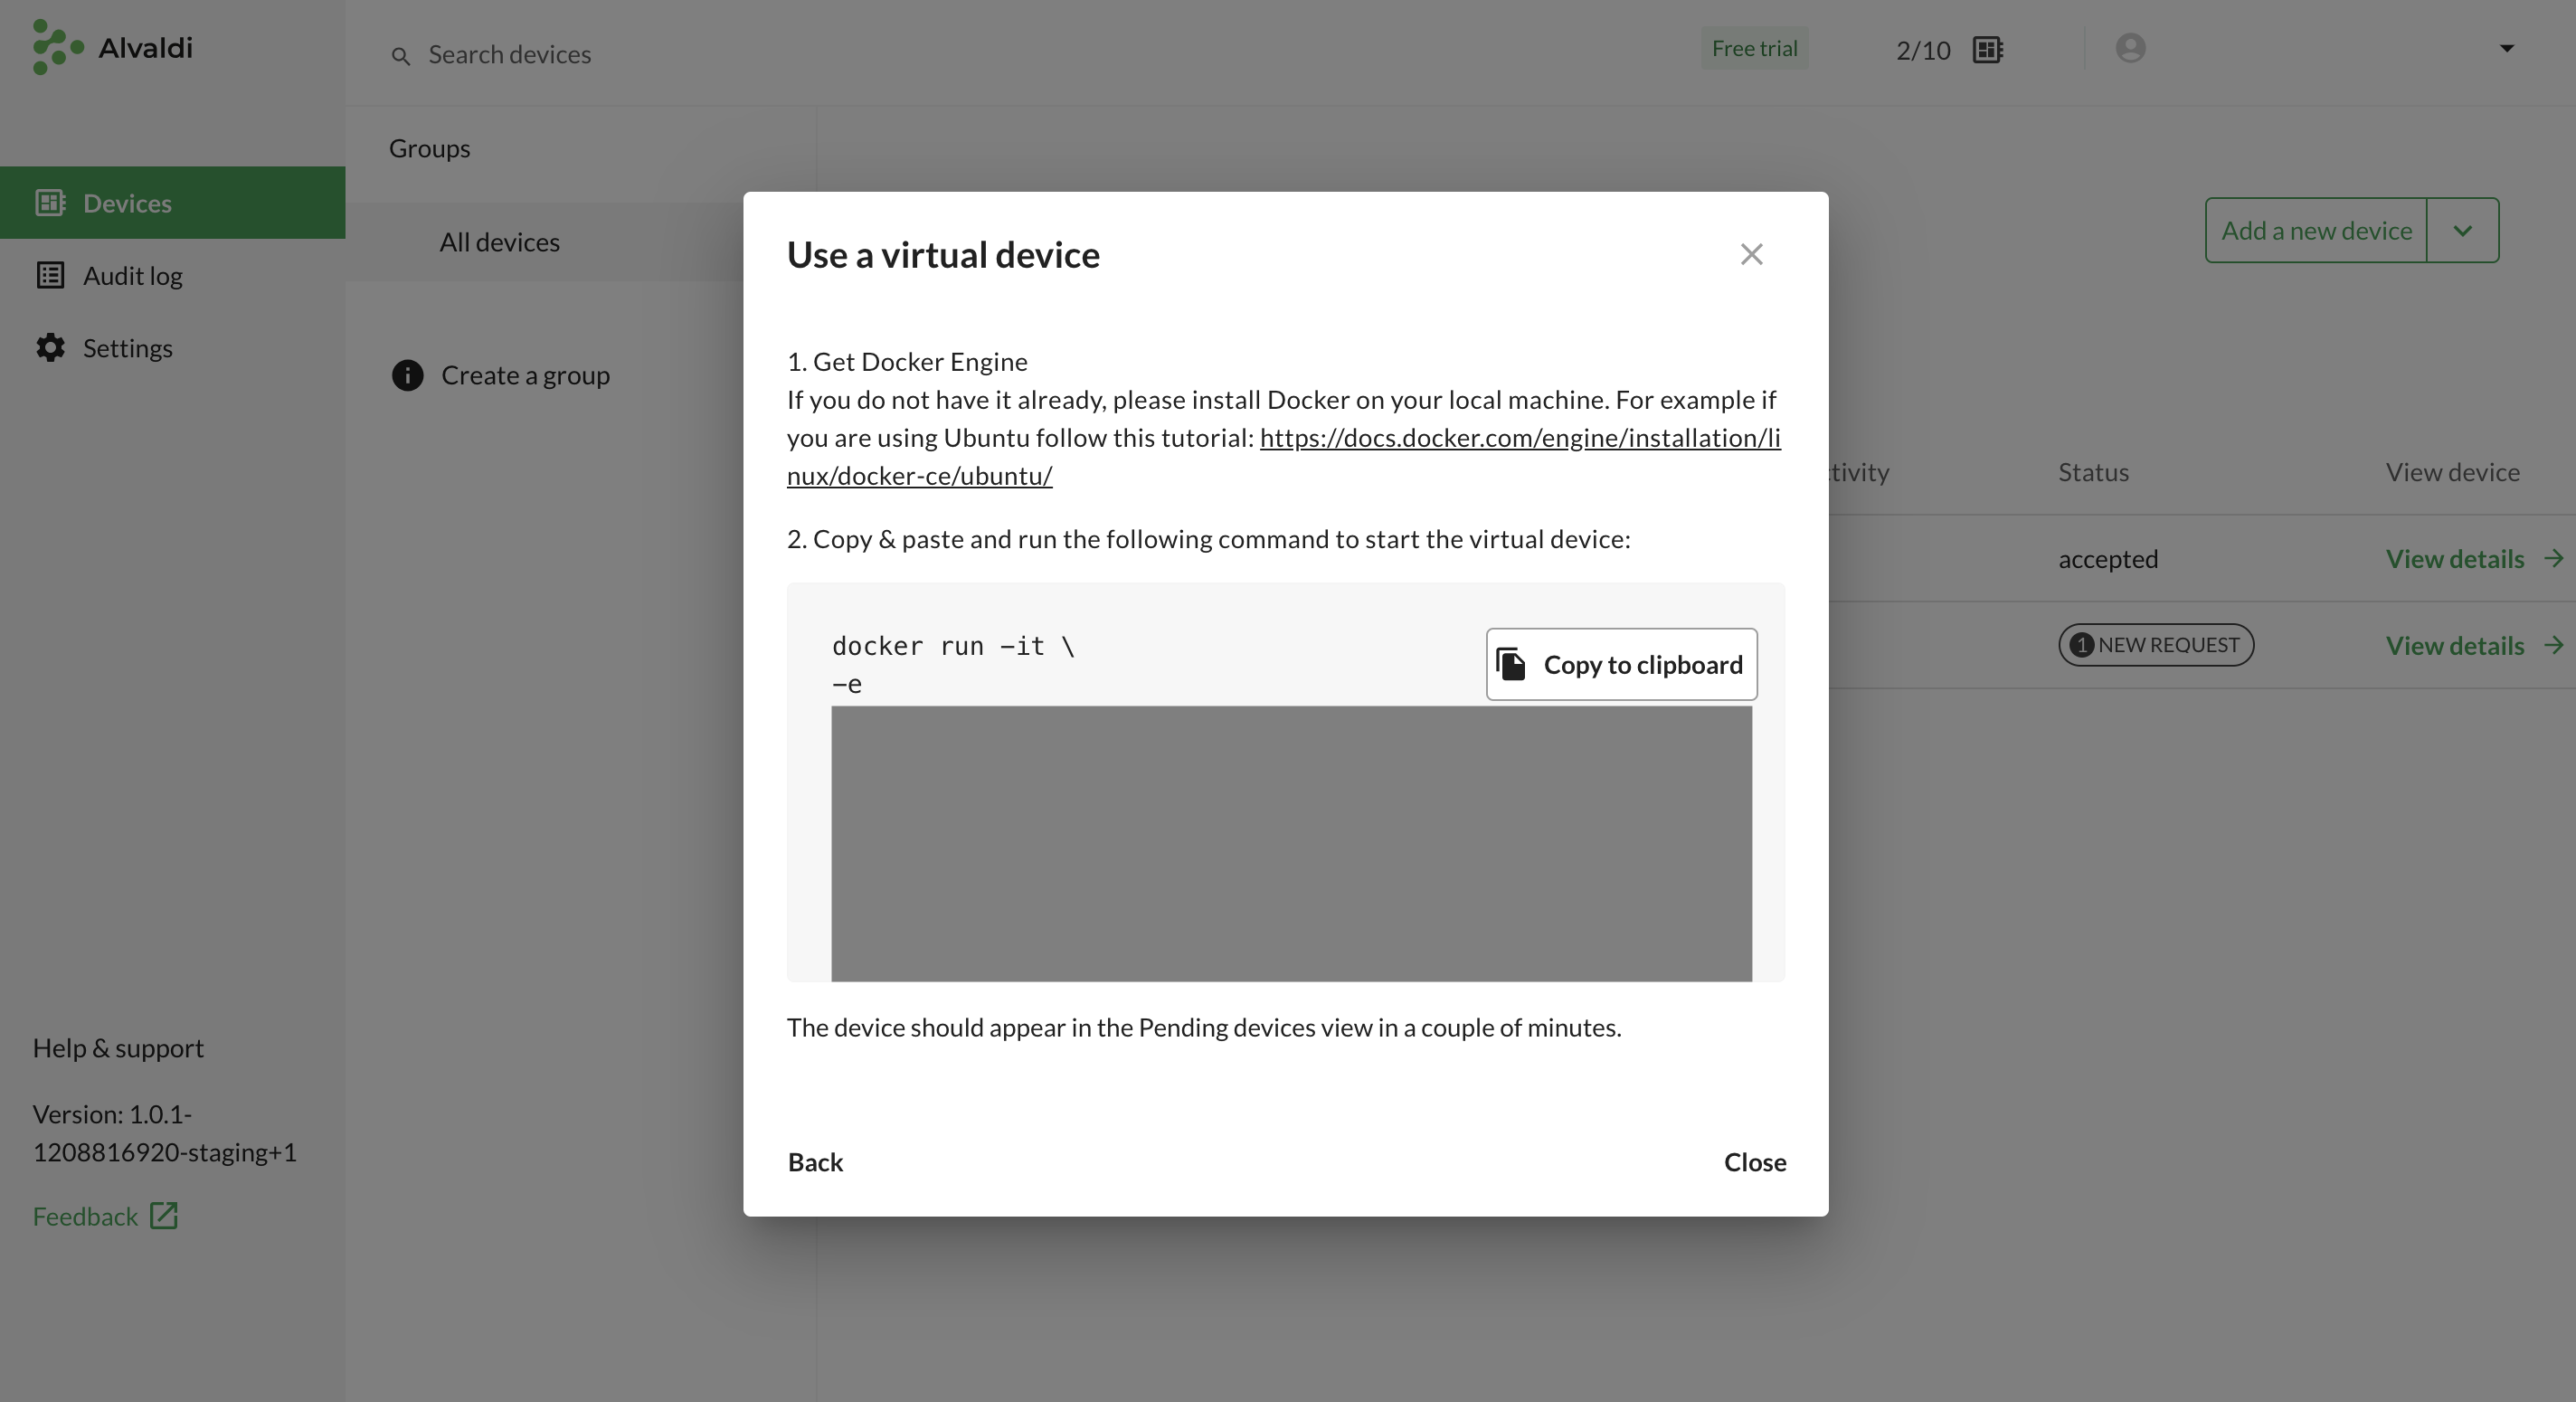
If you have a raspberry pi ready to test Alvaldi, click the Raspberry Pi quick start option. Otherwise, Virtual device gives you an easy way to test the the features of Alvaldi with a client running inside a Docker container on your computer. (This requires that you have Docker installed on your computer).
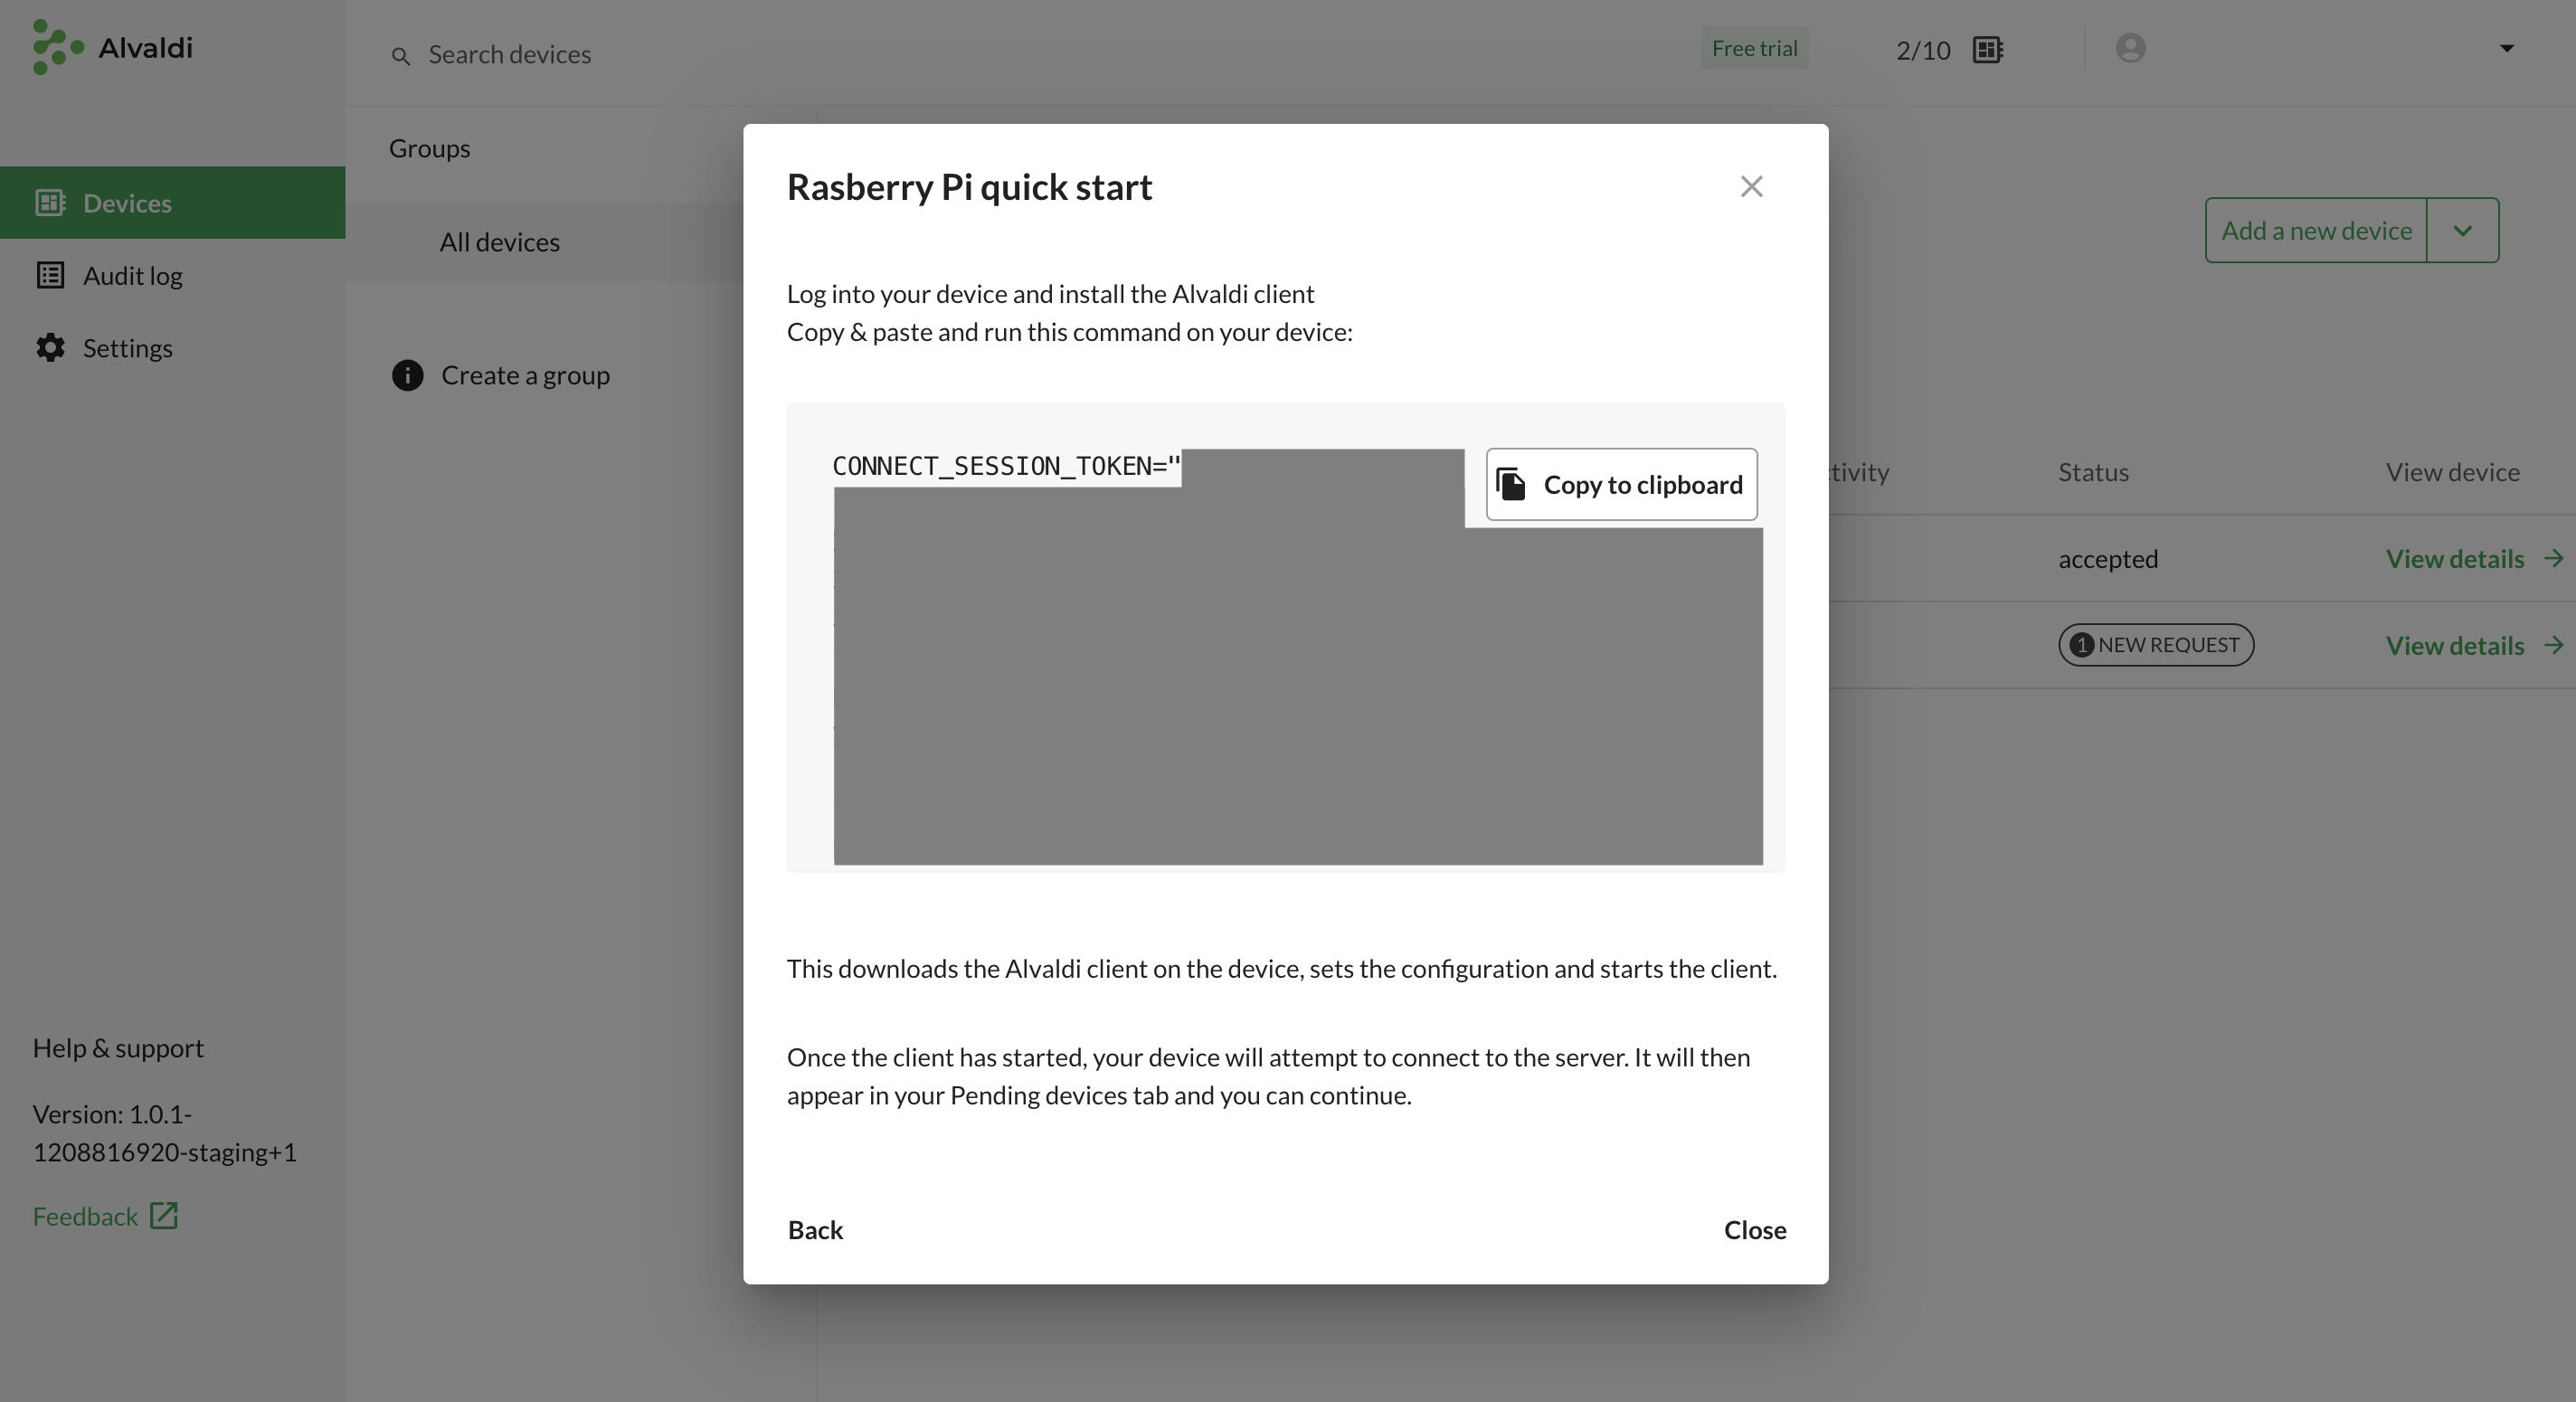
The Raspberry Pi quick start option will show you a script that you can copy and paste into your Raspberry Pi terminal to install the client:
Similarly, the Virtual device option also shows a script which can be copied into the terminal to download and run the appropriate Docker container:
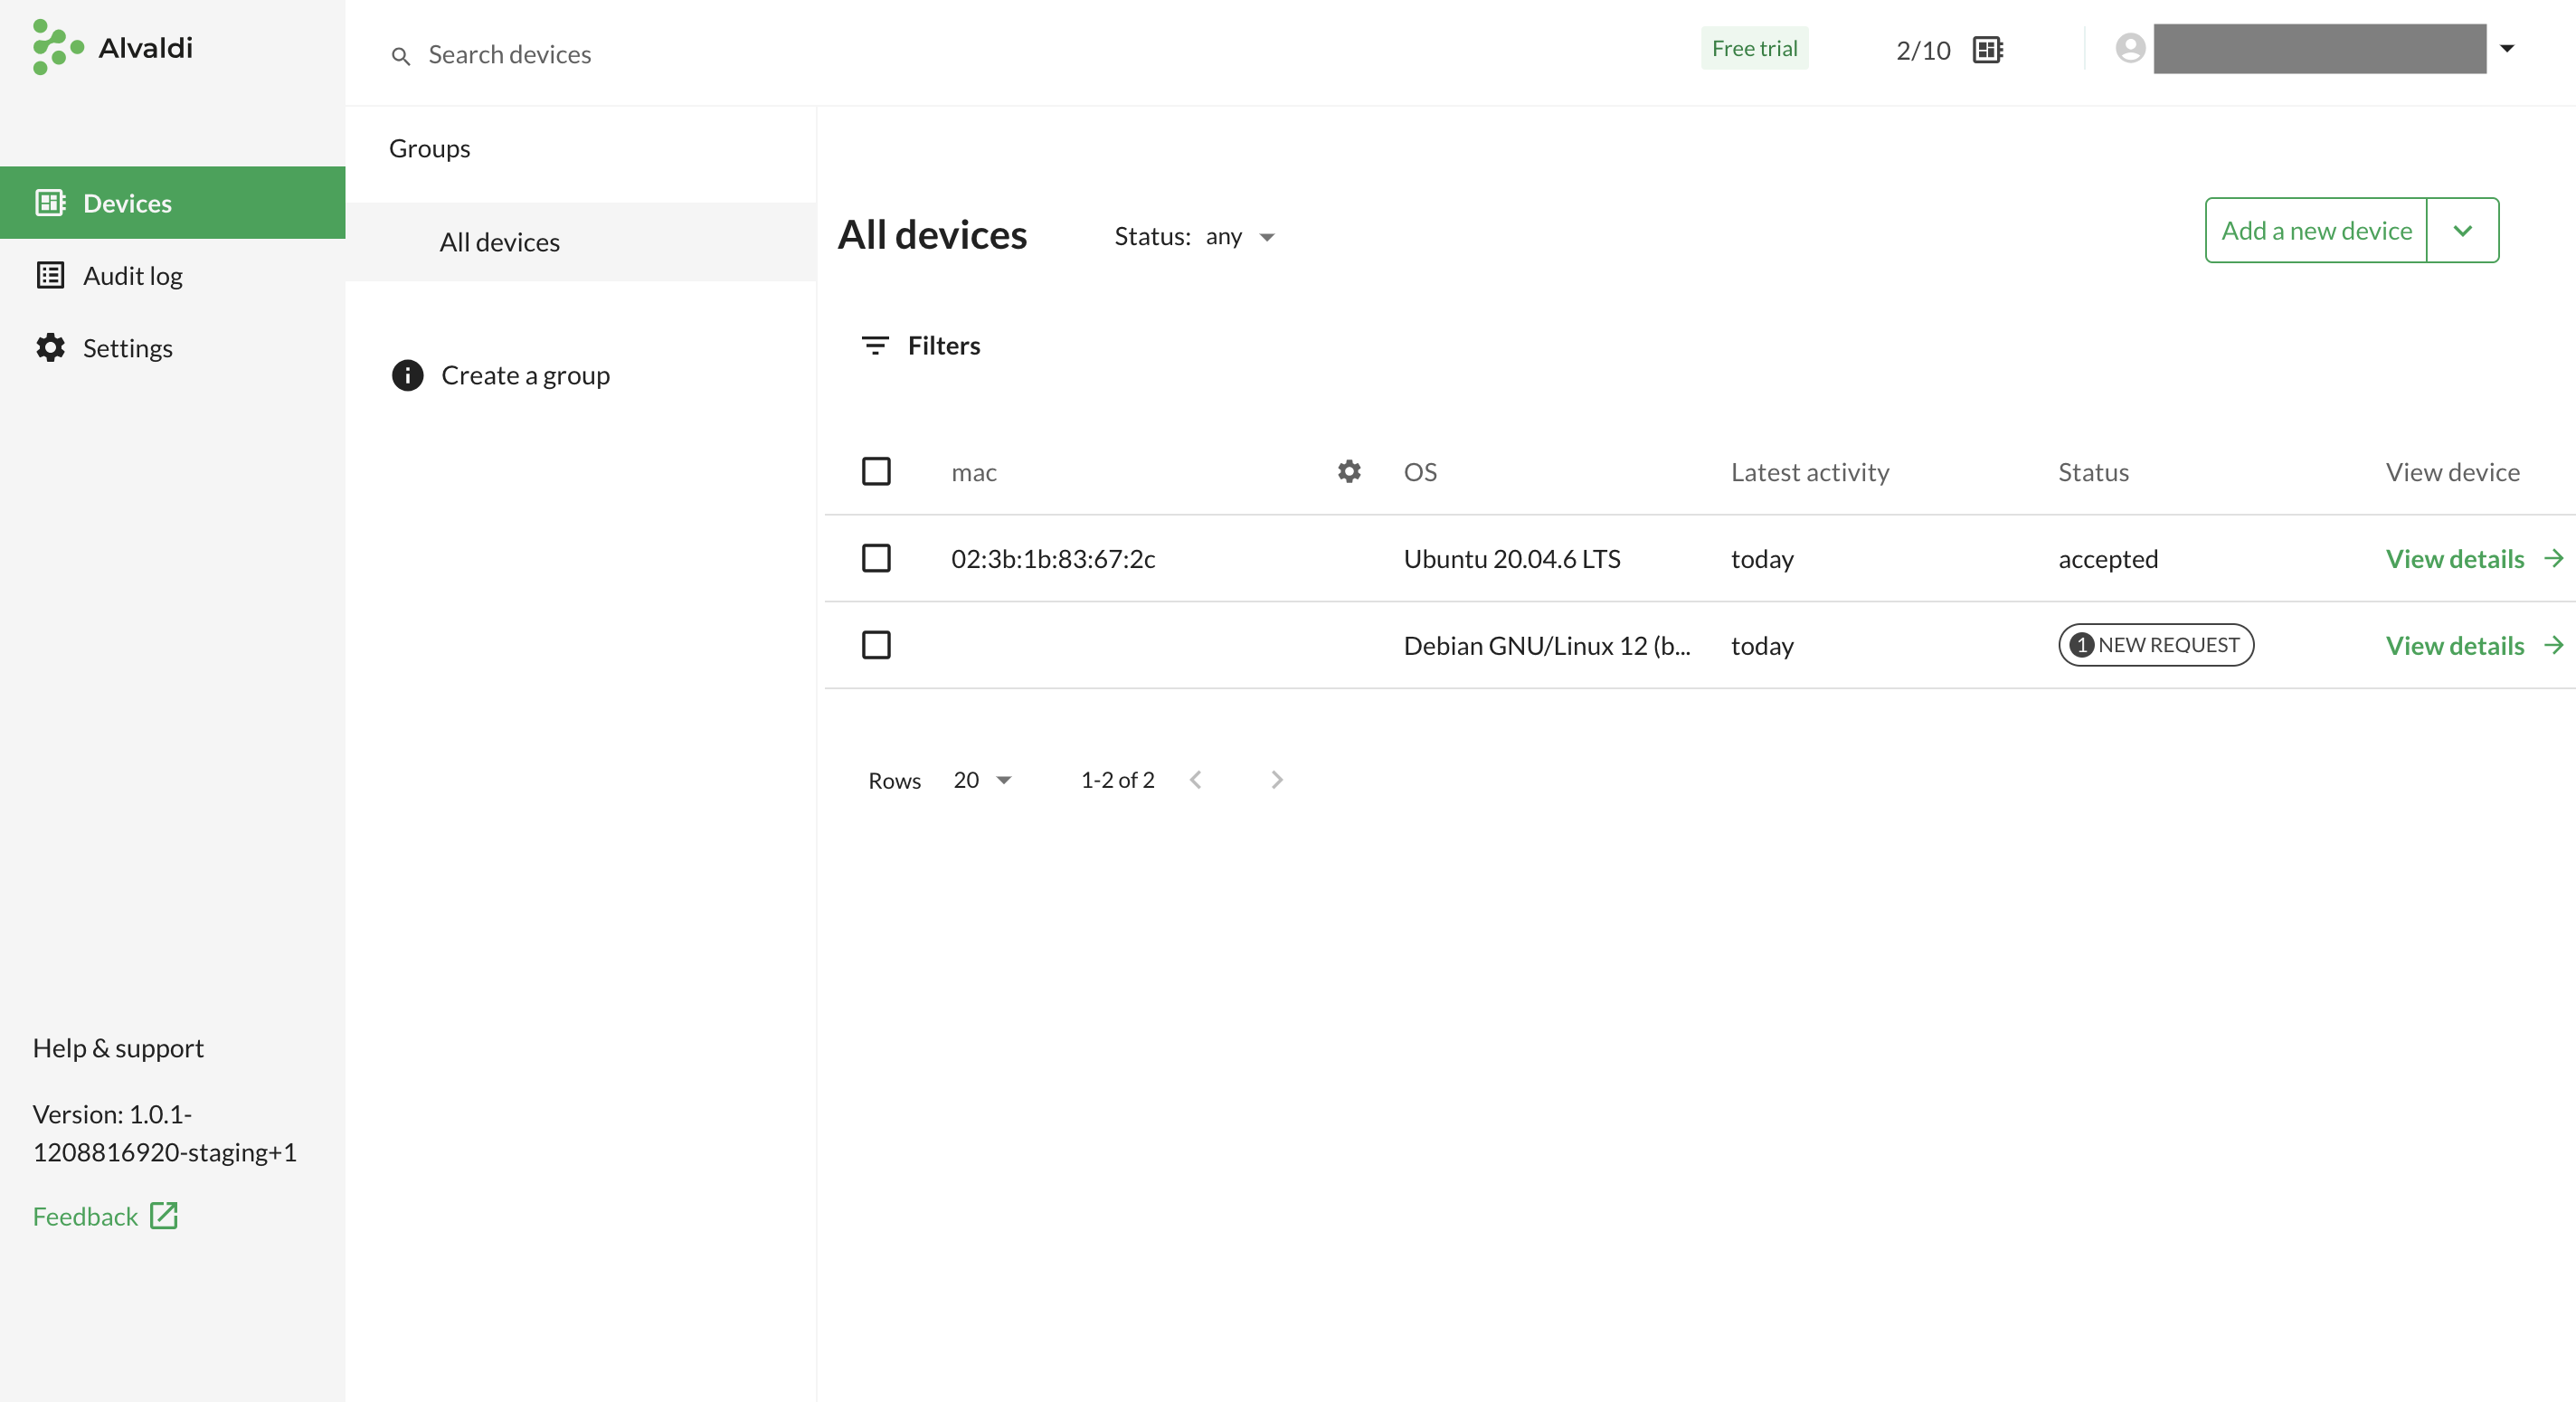
Either way, the result will be the same - your new device will show up in the device list.
Step 3 - Approve the device in the UI
When the client is installed, the device will appear in the device list:
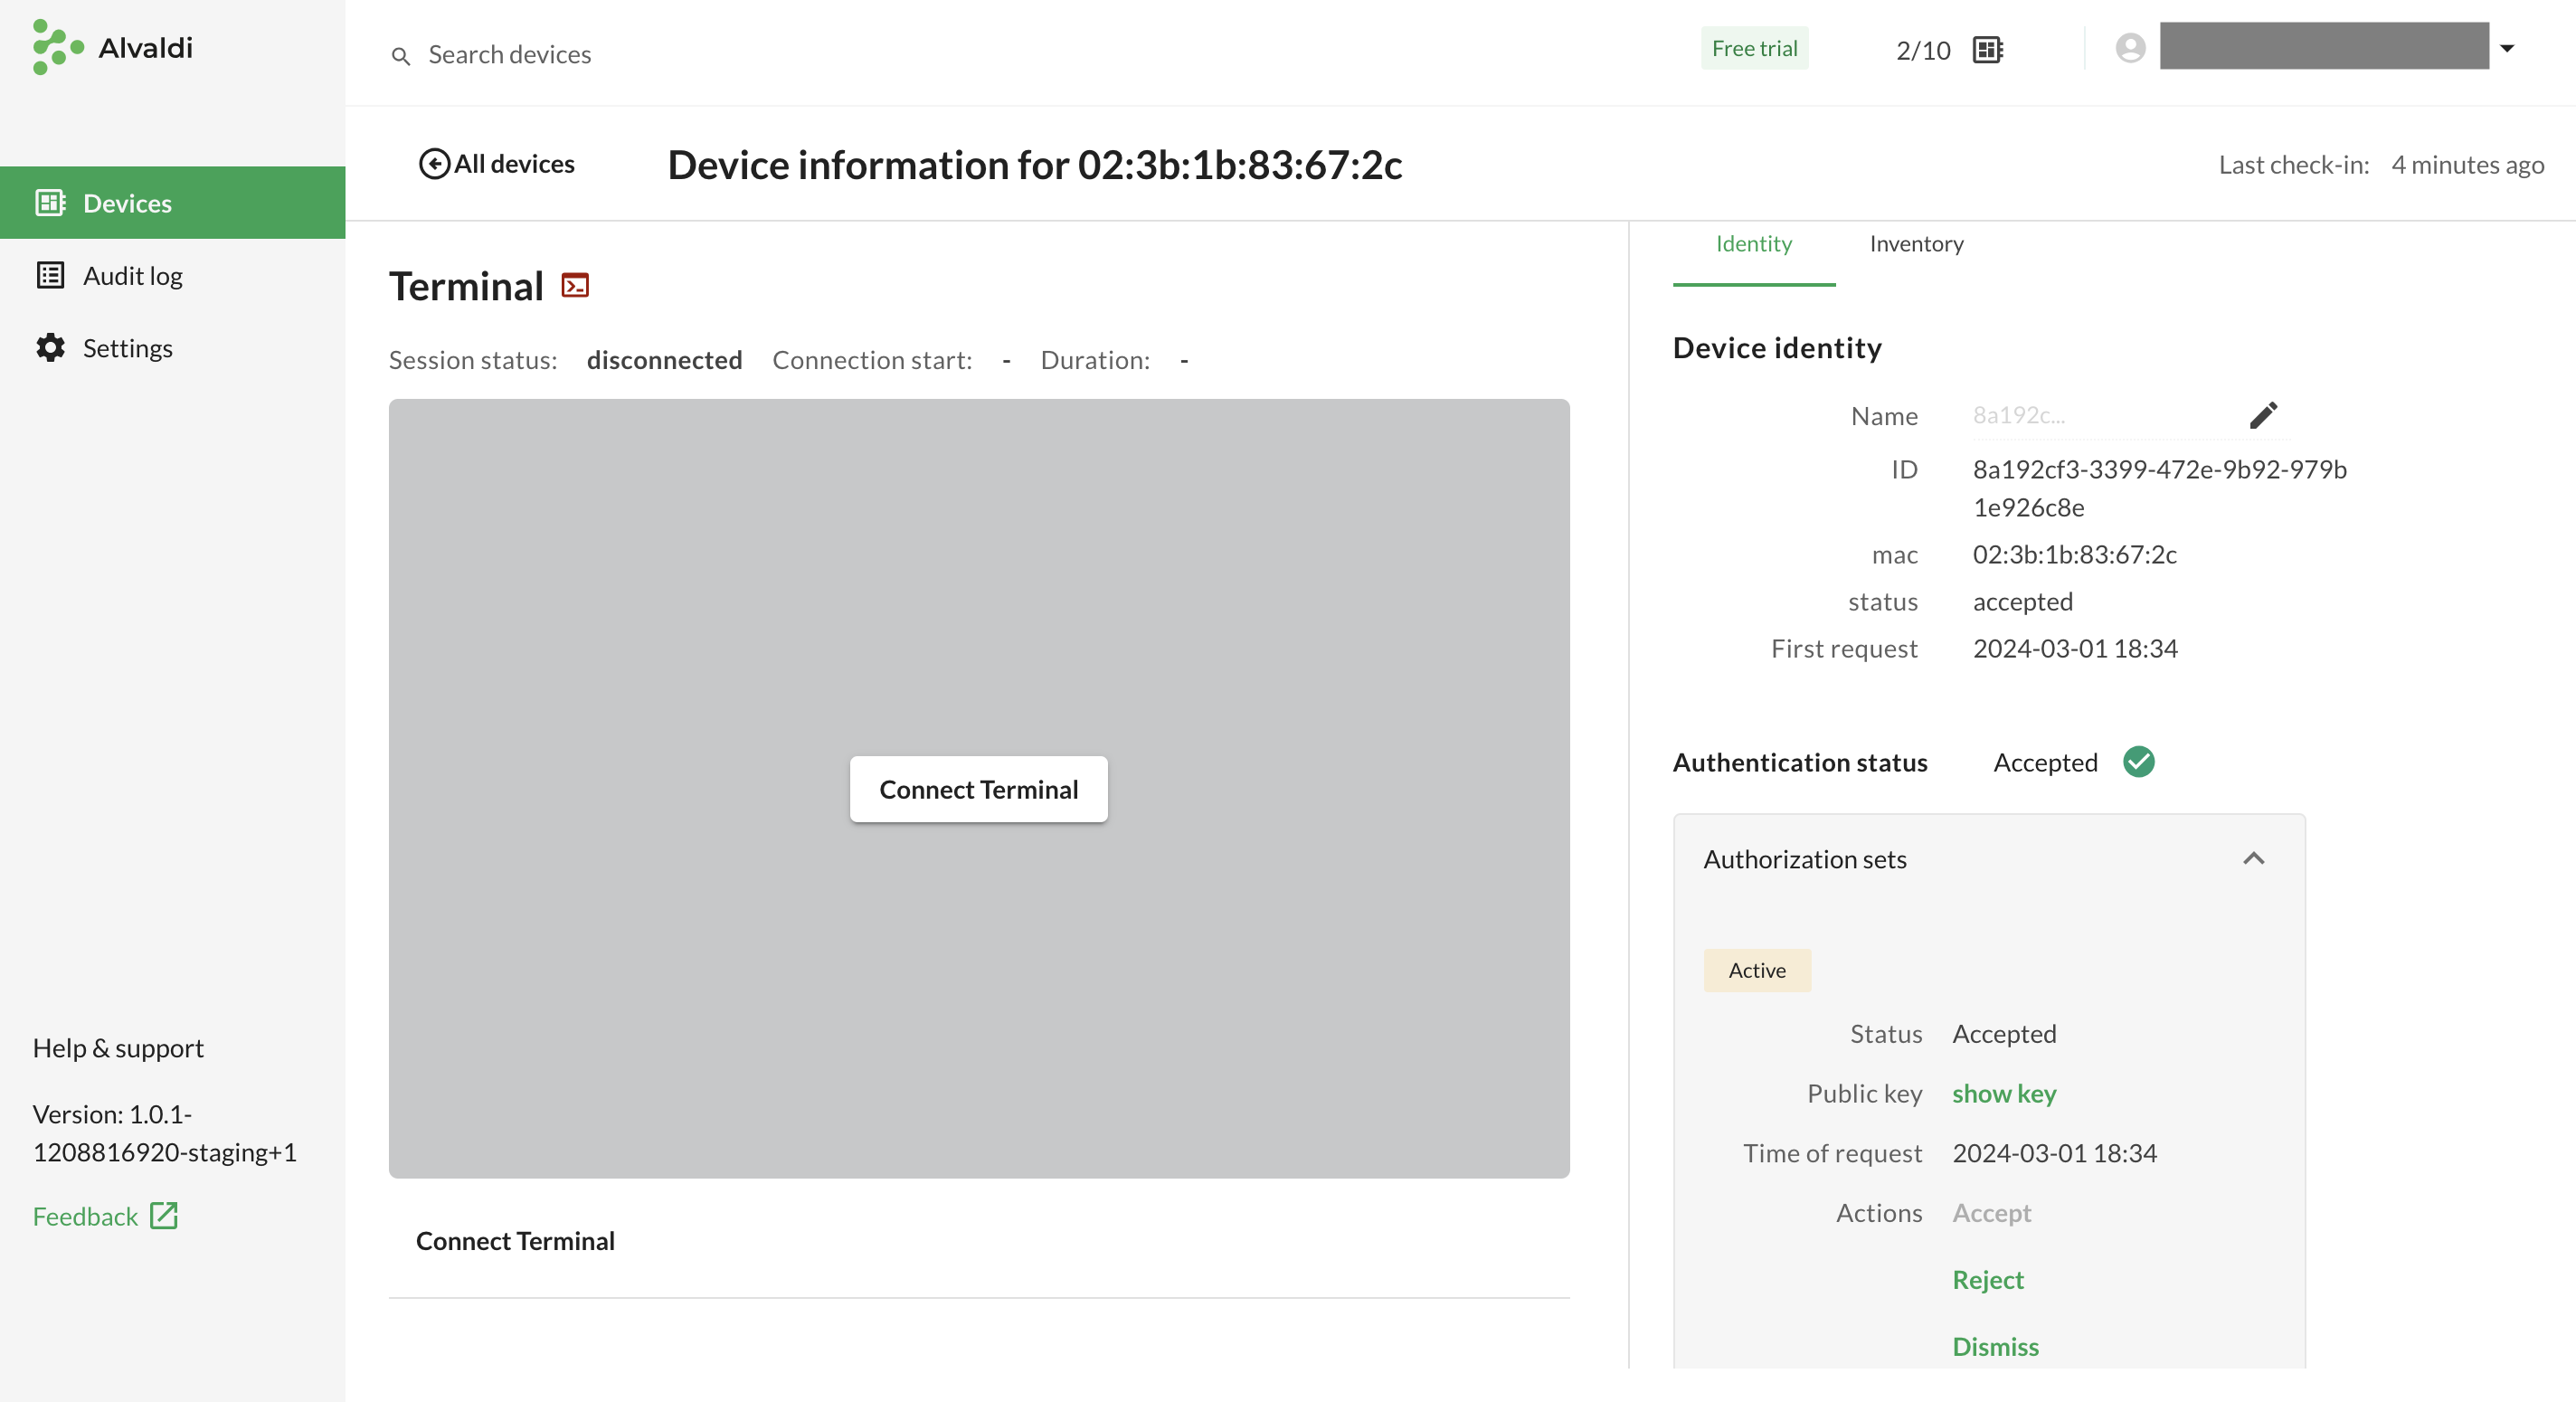
Click Accept to approve the device:
Devices are ready
Once the client is installed and their identities are approved, you are ready to start using Alvaldi for troubleshooting and remote access to your devices.
Up next
The next part of the getting started series is:
Still need help?
 Contact us